Share


Steven Nguyen, July 8, 2022
Get the Best Solution for
Your Business Today!
Serverless is becoming increasingly popular in the world of application development. The concept allows developers to create and run applications without the need of setting up their own servers. Some of the most essential parts of a serverless application are the computing service and the HTTP gateway service. The computing service is what runs your application code, and the HTTP gateway service is what allows you to call the code. In this article, we are going to walk through the steps of setting up a function through AWS Lambda, connecting that function to a callable API with AWS API Gateway, and calling the API through a custom web application.
Table of Contents
What we will be building
Like many people lately, I have been obsessed with FromSoftware’s latest game: Elden Ring. For this project, I wanted to incorporate the game in some way and I decided to build a simple web page that displays the various weapons and armors that can be found in the game. The project utilizes a fan-made API, found here for anyone interested https://docs.eldenring.fanapis.com/docs, that allows you to query for information about the game.
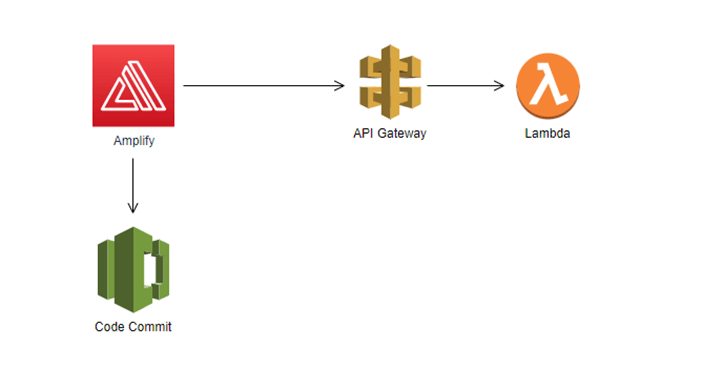
The Architecture for this project
- There will be a web application hosted on AWS Amplify service. The project source is pulled from an AWS Code Commit repository
- The web application will make an HTTPS request to the API Gateway
- The API Gateway routes to the request to a Lambda function, which calls the Elden Ring Api, transforms the data, and returns it to the web application
The results are then displayed to the user
Create the Lambda Function
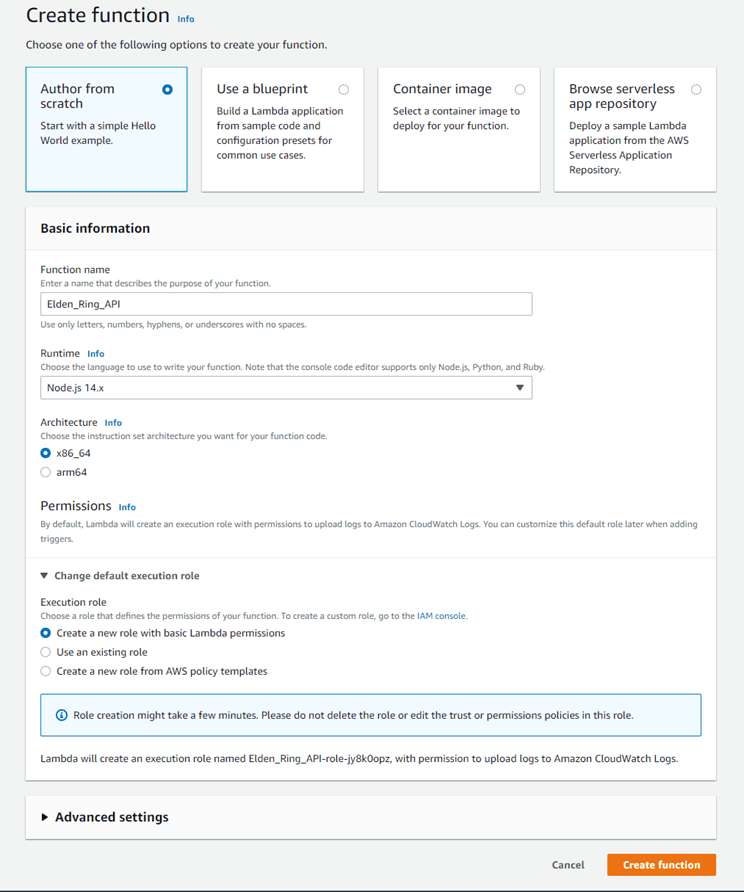
- Head over to AWS Lambda and click on the Create function button at the top of the page.
- At the top, you will have 4 options on how you want to start the function. The Use a blueprint option provides many existing templates that you can use based on your needs. For this tutorial, we will be creating a function from scratch.
- When creating from scratch, Lambda provides a lot of control over how you want to set up the function. You can choose the
- language of the function
- the processor architecture
- permissions via IAM roles (by default, a new role will be created with basic Lambda accessibility if no roles are chosen)
- Once you create the function, you’ll be taken to a screen that looks like this
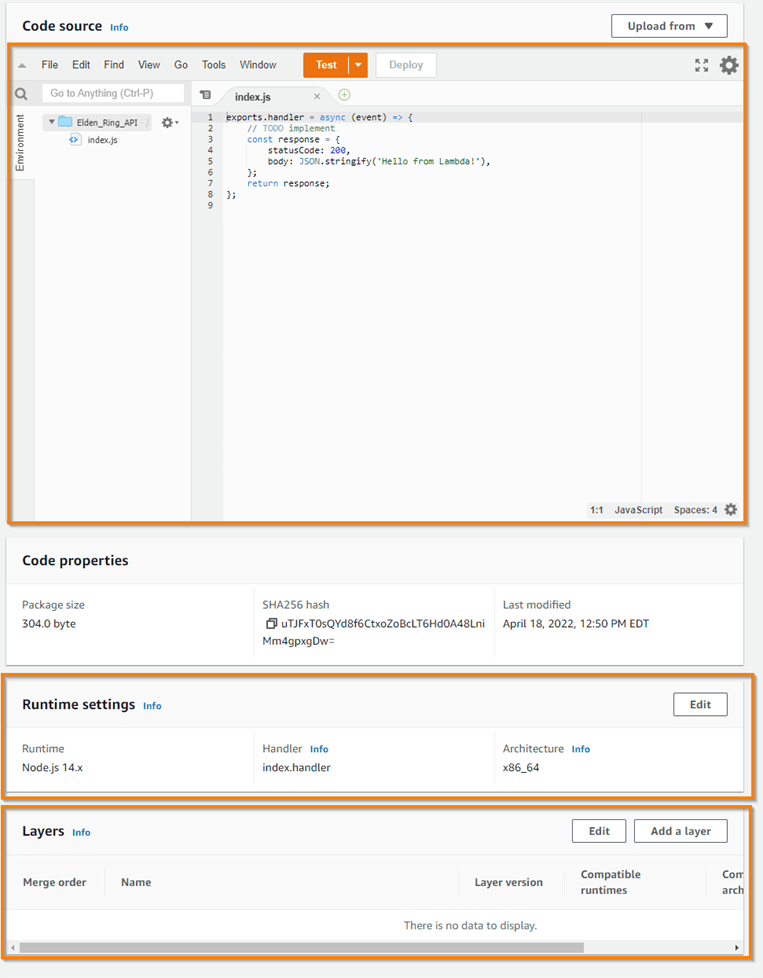
- Code source
- This is the code editor where you will write the logic for your function
- Runtime settings
- If you made a mistake during the previous screen, such as choosing the wrong version of a supported language, you can easily change it using the edit button
- Layers
- An important component of Lambda that we will be using for this project
Lambda Layers
- Layers is a functionality that allows your Lambda function to run additional code. This additional code can be logic that is shared amongst multiple functions, and even libraries that are required for your code to run.
- For this project, we will create a layer that will contain the axios NPM package that we will use to query the Elden Ring API
Creating and applying the Layer
- Head over to the AWS Lambda page and look at the left side menu. You will see a section for Additional resources and a Layers option. Click the Create button on the top right of the page
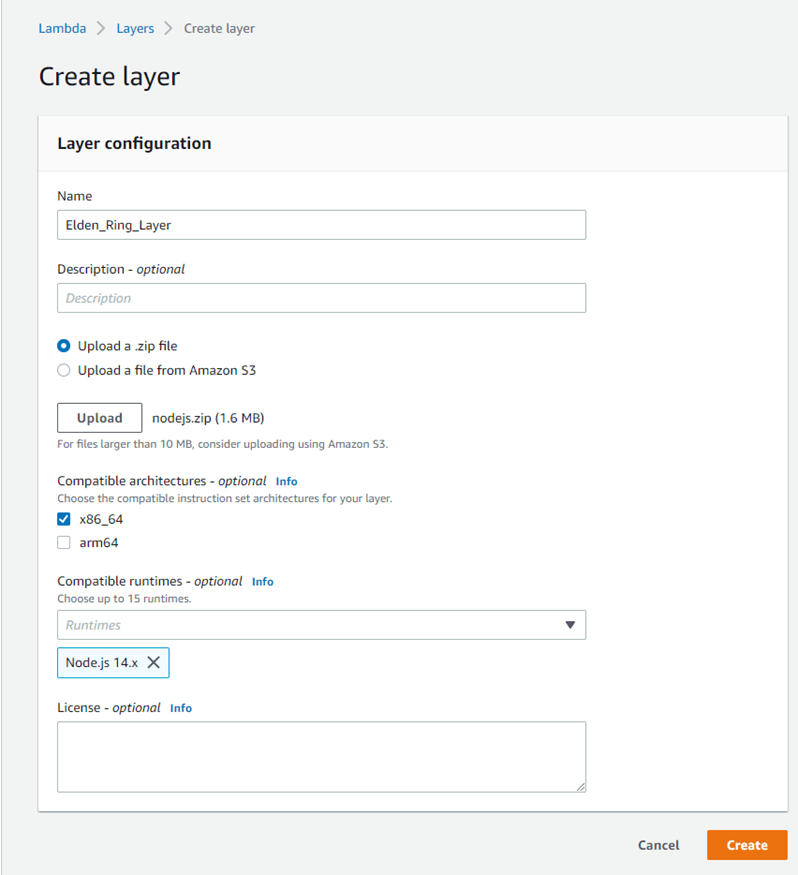
- On the next screen, you will be prompted to
- Enter a name for the layer
- Choose the compatible architecture (make sure it’s the same as the function)
- Choose compatible runtimes (make sure it’s the same as the function)
- Upload a zip file with the logic
- In this project, we are uploading a folder that contains the node modules (axios)
- For node modules, Lambda requires a specific directory structure
- You will need to make sure that the parent folder’s name is nodejs and directly beneath that the node_modules folder.
- Once you unzip the folder, the nodejs/node_modules directory should be directly accessible.
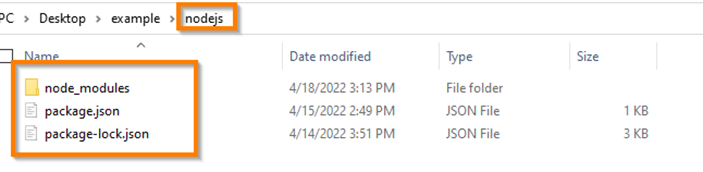
- Any other structure will not work!How to create the directory
- Create a directory called nodejs
- Within it, run npm init
- Several prompts will appear, accept the default for each
- Then run npm install axios
- Your directory should look something like the image below
- Zip the nodejs directory
- Once you created the zip folder and filled out the Layer creation form, you should see something like the image below
- Click create and the layer will be ready for use by our function
- Head back to the Lambda function screen and click Add a layer in the Layers section
- Select Custom layers and the layer we just created will appear in the drop-down list
- Next select the version, which should be 1 with our new layer
- Every time you update the layer, a new version number will be created.
- So, if you ever need to, you can use an earlier version of the layer
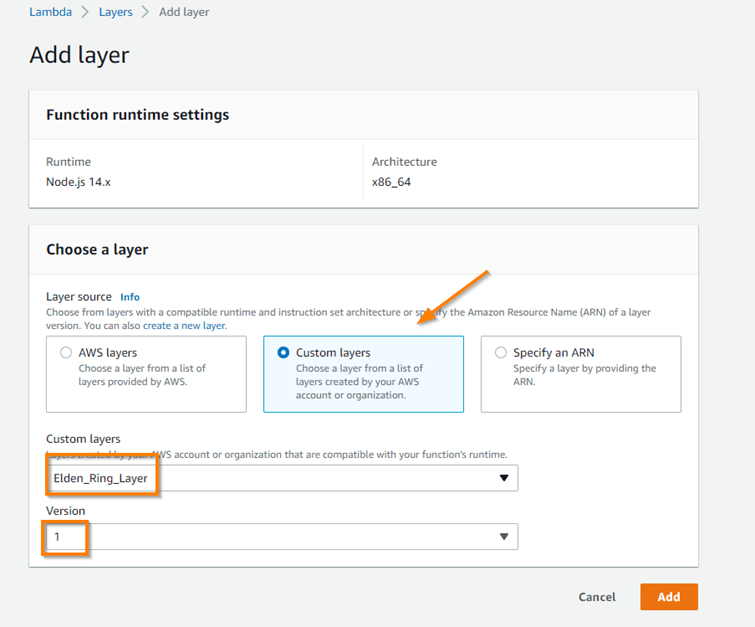
- With the layer added, you will now see it in the Layers section. Now the Lambda function will be able to use the axios package
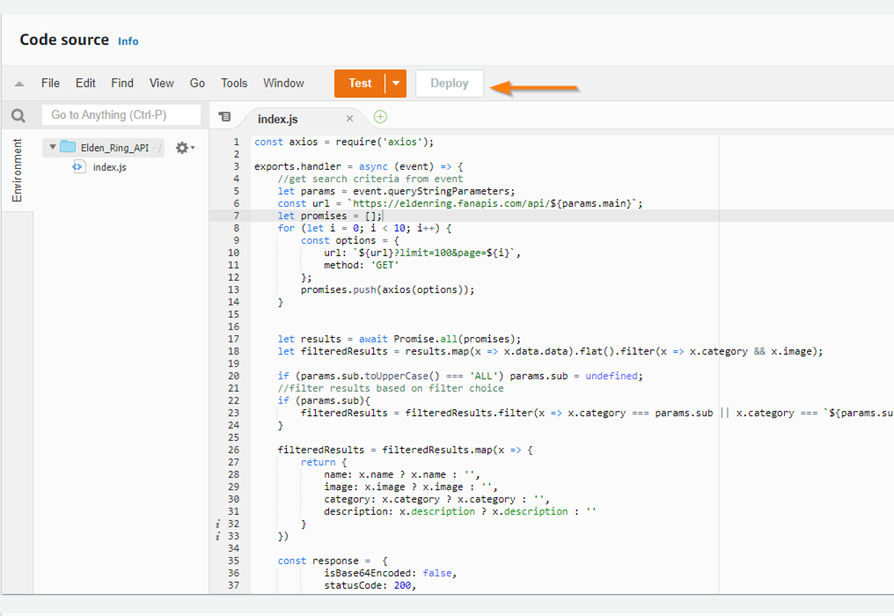
Writing the code
- In the code source section, we can add the logic for our Lambda function.
const axios = require('axios'); exports.handler = async (event) => { //get search criteria from event let params = event.queryStringParameters; const url = `https://eldenring.fanapis.com/api/${params.main}`; let promises = []; for (let i = 0; i < 10; i++) { const options = { url: `${url}?limit=100&page=${i}`, method: 'GET' }; promises.push(axios(options)); } let results = await Promise.all(promises); let filteredResults = results.map(x => x.data.data).flat().filter(x => x.category && x.image); if (params.sub.toUpperCase() === 'ALL') params.sub = undefined; //filter results based on filter choice if (params.sub){ filteredResults = filteredResults.filter(x => x.category === params.sub || x.category === `${params.sub}s`); } filteredResults = filteredResults.map(x => { return { name: x.name ? x.name : '', image: x.image ? x.image : '', category: x.category ? x.category : '', description: x.description ? x.description : '' } }) const response = { isBase64Encoded: false, statusCode: 200, headers: { "Content-Type": "application/json", "Access-Control-Allow-Origin": `${event.headers.origin || event.headers.Origin}` //API Gateway doesn't follow case sensitivity standards for requests. So we must account for case-sensitive headers }, body: JSON.stringify(filteredResults) }; return response; }; Code overview
- exports.handler is the function that runs when your Lambda is invoked. Once the handler exits or returns a response, it becomes available to handle another event
- All lambdas must have the handler method
- The event argument is an object that contains information about the invoker, such as the origin of the request or any parameters that are passed in
- The code makes a query to the Elden Ring API using the parameters passed into the event parameter
- Once the data is queried, we filter out any results that have no category or image defined
- ‘Then we map through those results, grab the data we need, and return it in the response
- Once you added the code, you need to…
- Save the file
- Click the Deploy button
- Your changes will not take effect until they are deployed
- The Lambda function is now completed and ready to be connected to an API gateway!
Create the API Gateway
- Head over to the AWS API Gateway page and click Create API button
- You will be presented with 4 options on how you want your gateway. For this project, we will use the 3rd option Rest API.

- On the next page, we’ll give the gateway a name and keep everything else with the default values
- Click the Create API button and you’ll be taken to the next screen. On this screen you will see an Actions drop down. We are going to use this drop down to…
- Create a resource
- Create a method
- Enable CORS
- Deploy the API

Create Resource
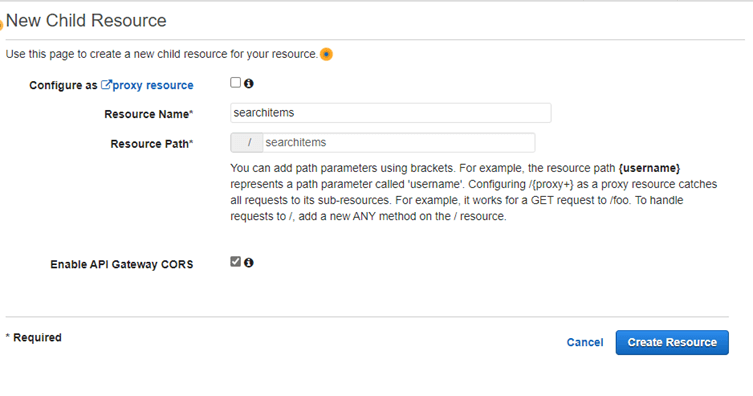
- When you create an API, you are given a unique URL.
- The resource you create are the endpoints of this URL that we can call to perform specific actions
- In our case, we will name our resource searchitems
- Notice that whatever you type in the Resource Name field will automatically be added to the Resource Path field below
- Check the Enable API Gateway CORS option
- Click Create Resource
- You will now see the resource we just created added to the screen
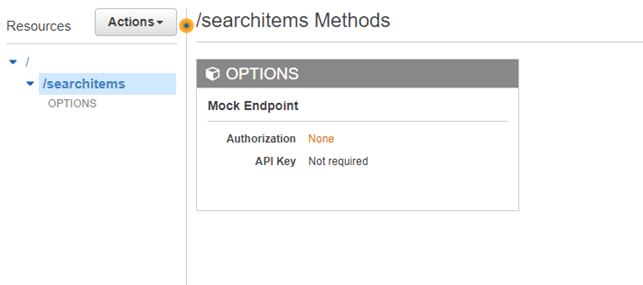
Create Method
- Methods are the type of HTTP request we can assign to our resource (GET, PUT, POST, DELETE, etc.)
- Select the searchitems resource, click the Actions drop-down menu, and click the Create Method option
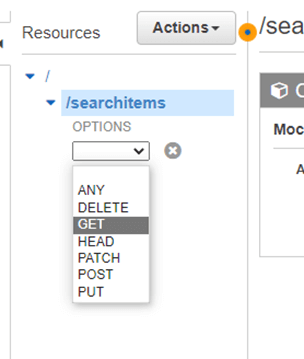
- You will now see a new drop-down under the searchitems resource.
- Select the GET method and click the checkmark that appears
- You will now see a page that allows us to set up the integration of the method.
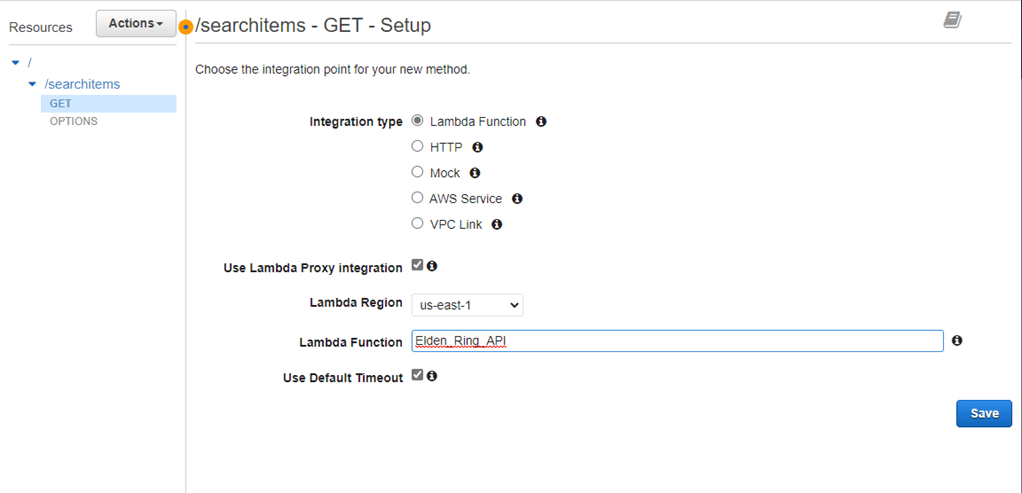
- Since we want to link this method to our Lambda function, we will select the Lambda Function integration type
- We also want to check the Use Lambda Proxy Integration box
- This will allow the function to see request details in the event parameter
- In the Lambda Function field, start typing out the name of the Lambda and it will auto-detect any existing functions
- Click Save and allow the permission to be created
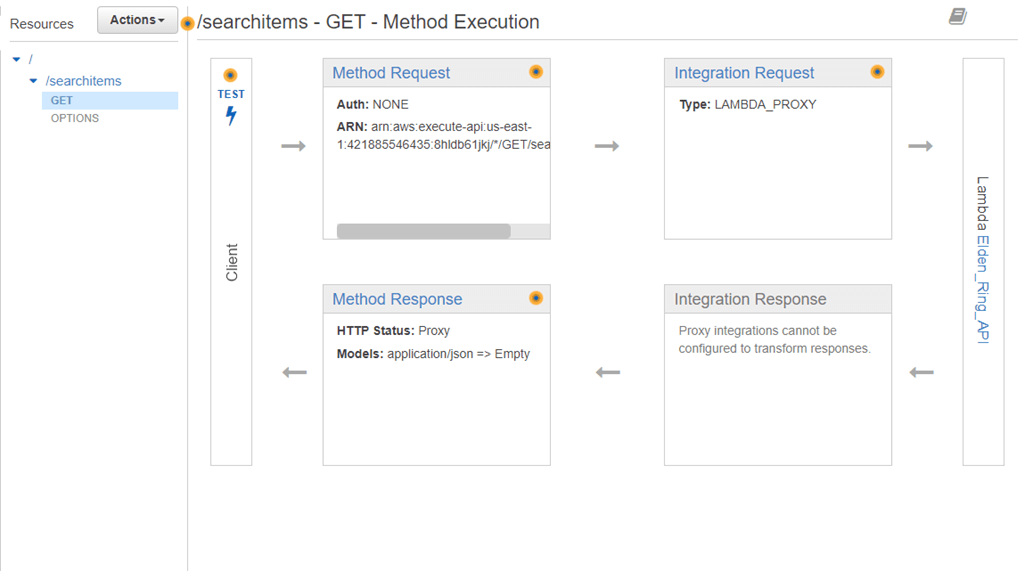
- We have now created a searchitem resource with a GET method that is linked to the Elden_Ring_API Lambda function
Enable CORS
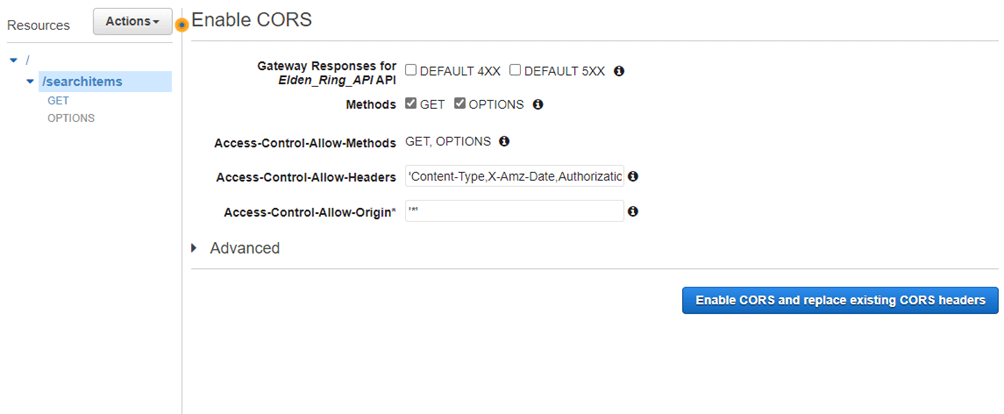
- Next, we will want to enable CORS
- Click the Actions drop-down and select the Enable CORS option
- Keep everything as the default on this page and click the Enable CORS and replace existing CORS headers button
Deploy the API
- Lastly, we will need to deploy the API
- Just like Lambda functions, any changes you make will not apply unless you deploy
- In the Actions drop down, select the Deploy API option
- You will see a pop up window with an option to select Deployment stage
- Select [New Stage] and the fields will expand prompting for a Stage name
- You can give these any name, but you would want them to relative to the environment you are developing in
- For example, if you are in a development environment, you would typically name it dev. In a production environment you would name it prod, and so forth
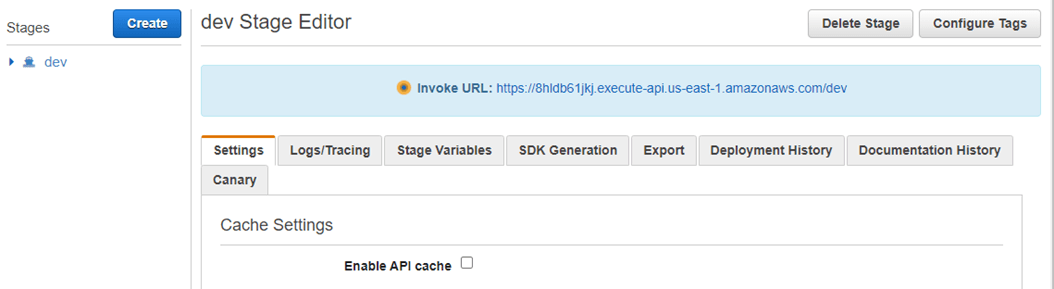
- For this tutorial we will name the stage dev
- Click Deploy and you should now see the dev stage with the invoke URL
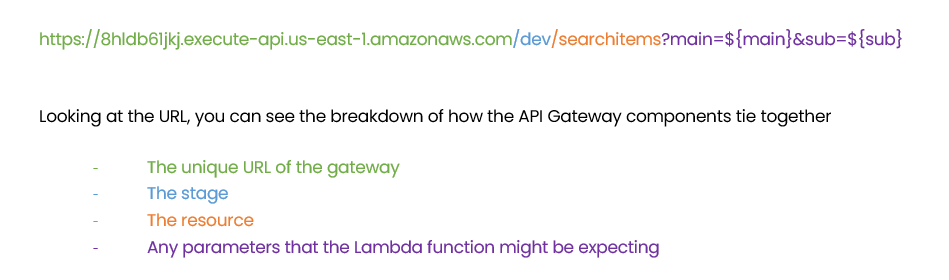
- With the invoke URL, we can append the resource to the end to invoke our Lambda function
- https://8hldb61jkj.execute-api.us-east-1.amazonaws.com/dev/searchitems
- You can create more resources and methods as needed for this URL

Invoking the Lambda through web application
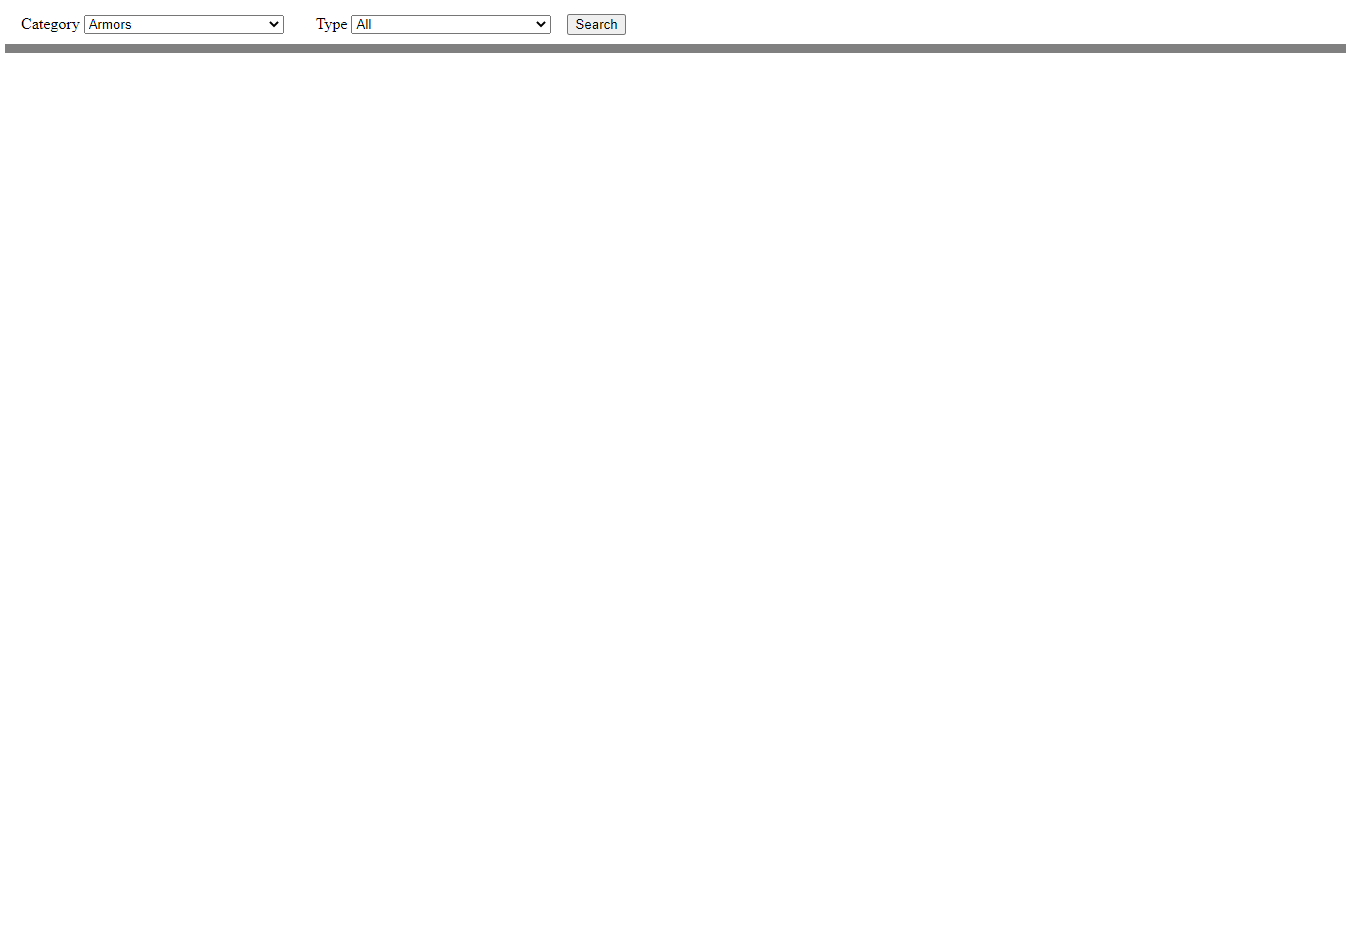
With the API Gateway created, we can now call the API in our web application. The web application will include two drop-down menus. One menu for choosing the main category of items and one menu for choosing the sub-category item. Both of the values selected will be passed to the API as query string parameters when the search button is clicked. You can view a working demo of the project here: https://main.d3iwvln5bkz1mg.amplifyapp.com/
Conclusion
In this tutorial, we have successfully created a fully functional serverless application. While we have only covered the very basics of Lambda and API Gateway, I hope this guide has helped you better understand these tools and how to use them. Both these tools offer a lot of functionalities that can be expanded upon and fit any needs your project may have!
Next Steps
If you need help or just want to talk shop, reach out to us!
Be sure to subscribe to our newsletter to have PMsquare original articles, updates, and insights delivered directly to your inbox.