Boost Cognos Usability with a Custom Folder Extension

Introduction
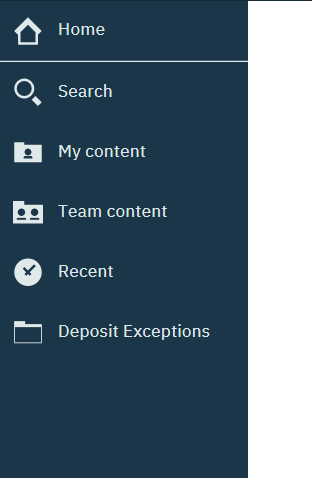
There are times when a custom folder is needed to be added to the NavBar (left vertical bar) in Cognos Analytics. Maybe a commonly accessed folder is buried in the folder hierarchy structure and needs to be referenced more easily. The following steps will show how to add a folder to make access easier.
Create the JSON file
Adding this folder is treated as an extension in CA. Extensions are developed with JSON scripts. There are many different variables that can be customized. Below is a starting point for the script which is also embedded in this document at the end. The file is named spec.json.
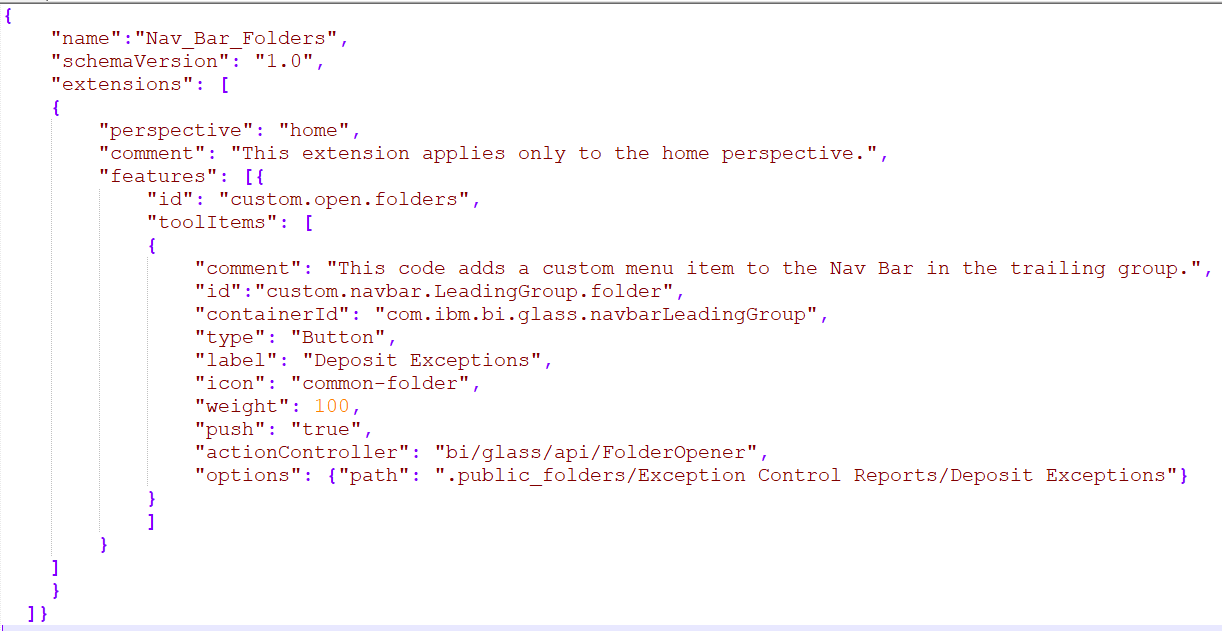
The field “name” can be anything to refer to the code. This is what will appear in Cognos in the extension list when it is imported.
The “schemaVersion” can be anything to keep track of versioning if desired.
Comments can be added to the code wherever desired by including a “comment” section.
The field “perspective” refers to the CA perspective under which you want the extension to show. There are 5 perspectives with “common” applying to all views. The others are “home”, “authoring”, “dashboard” and “modeller”. Experimentation may be necessary to have the extension show up in the correct perspective or view.
Under the “features” section, the ID value is not important if you only have one item being added. If you are nesting multiple items then there is a possibility that you will have to refer to this ID as part of a group. IDs do need to be unique though.
The “toolItems” collection is where the specific properties of the item being added reside. Once again, you can add any number of comments for any of the parameters being supplied. The ID value isn’t important here other than to identify what it is that we’re adding – in this case a custom NavBar folder in the leading group.
The “containerID” is very important and needs to be exact. There are multiple values that can be placed here depending on where the item we are creating is being placed on the portal page. In this case we are adding it to navbarLeadingGroup which is the top set of icons in the NavBar.
The “type” should be one of three values: button, menu or menuItem. If you are creating a menuItem then the containerID should be a menu.
The “label” will be the text one sees when hovering over the item in the portal.
Select which icon you want to display with the “icon” field. In this case there are a couple of options for the folder icon. The traditional folder icon is “common-folder” but there is also a more modern folder icon called “ba_content_nav-folder_24” that could be used.
The “weight” sets the position in the container. The higher the value, the higher the position in the container. Experimentation may be necessary to get the exact placement desired.
The field “push” specifies whether the button is treated like a toggle where pushing the button a second time undoes the action of the first button push. Valid values are “true” or “false”. Since we are creating a folder this value must be set to “true”.
The “actionController” defines what the interface element will do when clicked. In this case we are opening a folder. The language should be exact.
The “options” will change depending on what was specified in the “actionController” section. For the open folder action, the location of the folder needs to be specified. This is set with the “path” option. Team Content is still referred to behind the scenes as public_folders.
Save and Zip to the install location
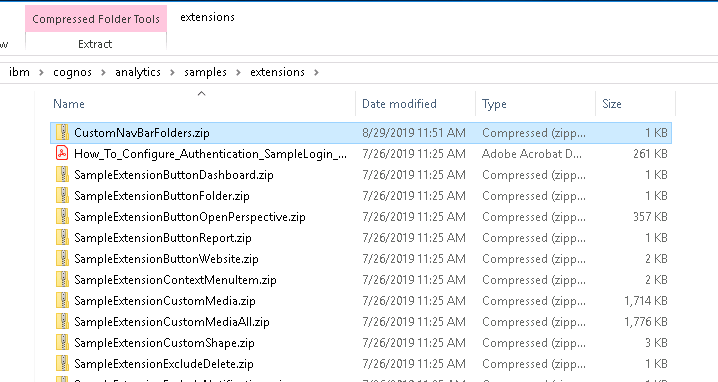
Now that the spec is complete save the file as spec.json. The same file name will be used for all extensions. Once it has been saved, zip it into a zip file name of your choosing. The name can be the same or different than what was set in the “name” field above. In this case the file name is CustomNavBarFolders.zip.
Copy the zipped file onto the same server where Cognos Analytics Server was installed. The specific directory can be anywhere but the icon locations are relative so putting it with the other extensions is probably desirable. That being the case, put the file in <install_location>/samples/extensions.
Upload to Cognos Analytics
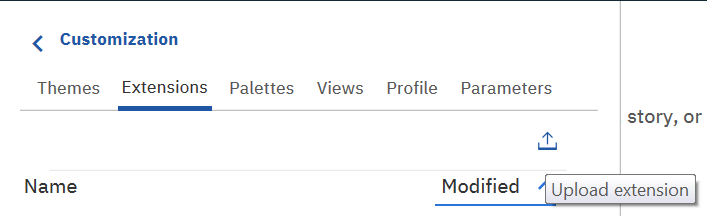
Open Cognos and log in as an administrator or as someone who has access to the Administration functions. Navigate to Manage > Customization and click on the Extensions tab at the top of the menu. Click the up arrow under Parameters to upload an extension.
Navigate to the location where the new extension was saved and select it. Click Open and the extension will be validated and uploaded. If for some reason there is an error in the code the extension will not upload and an error message will notify you. If the code is syntactically correct then it will appear in the list of extensions.
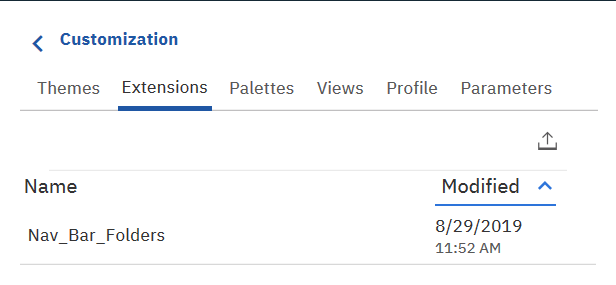
Refresh the browser window and the extension will appear.
Conclusion
Extensions give you another way to customize your Cognos analytics environment. Although the code isn’t overly complicated there are places that require exact wording in order for them to work. Play around with the features to give your environment a boost.
Next Steps
We hope you found this article informative. Be sure to subscribe to our newsletter for data and analytics news, updates, and insights delivered directly to your inbox.
If you have any questions or would like PMsquare to provide guidance and support for your analytics solution, contact us today.
