
Share


Viola Brudniak, March 3, 2025
Get the Best Solution for
Your Business Today!
SnowPark is reshaping how developers approach building applications with its new framework introduced by Snowflake. With the ability to code in popular languages such as Python, Java, and Scala, developers can now execute their scripts directly within the Snowflake environment. This innovative feature streamlines the creation of data-heavy applications by facilitating complex data transformations without the hassle of moving data around. As a result, workflows become much more efficient, allowing teams to focus on what really matters—delivering insights and value to their clients.
Table of Contents
Key Features of SnowPark
- Unified Development: SnowPark provides a unified environment for data engineering, data science, and application development. Developers can build complex data pipelines, run machine learning models, and perform data wrangling tasks, all within Snowflake’s data cloud, avoiding the need to switch between various tools.
- Support for Multiple Languages: SnowPark has native support for Scala, Python and Java. This flexibility makes it easier for developers to use their libraries when working with Snowflake.
- DataFrame API: SnowPark introduces a DataFrame API, like those found in Spark and pandas, enabling developers to manipulate data easily. The API allows for operations like filtering, grouping, and aggregation, all of which are executed directly in Snowflake, making it scalable and efficient.
- Seamless Integration with Snowflake: Since SnowPark operates within the Snowflake environment, all data transformations happen on Snowflake’s scalable infrastructure. This eliminates the need to move data between different environments, reducing both latency and expenses.
- Secure and Scalable: SnowPark benefits from Snowflake’s security and governance features. All operations and data access are governed by Snowflake’s access control policies, and because the computer is handled by the infrastructure, your workloads can scale automatically based on demand.
- Support for Machine Learning: SnowPark opens new possibilities for machine learning workflows directly inside the Snowflake environment. With Python, developers can run libraries like Scikit-learn, TensorFlow, or PyTorch, and train models on large datasets without moving the data from one environment to another.
- Collaborative Environment: SnowPark supports collaboration between data engineers, data scientists, and business analysts. As the data is stored in Snowflake, different teams can work on data transformation, feature engineering, and model building in parallel.
With SnowPark’s capabilities transforming the way developers interact with data; it’s time to see how these features work together. Let’s dive into a demonstration to showcase how SnowPark utilizes data operations and consolidates workflows– all within the SnowFlake environment.
Prerequisites
Before starting, make sure you have the following:
- Snowflake Account
- Python Environment: Python 3.8 or later is installed.
- SnowPark Python Library: Install the snowflake-snowpark-python library.
- pip install snowflake-snowpark-python
- Snowflake Connector: The Snowflake Connector for Python is also installed.
- pip install snowflake-connector-python
- Access Credentials: You have Snowflake access credentials (account name, username, password, role, warehouse, and database).
- Visualization Libraries: Install libraries like matplotlib and seaborn for creating visualizations.
- pip install matplotlib seaborn
Python from SQL Server Example
Step 1. Import the necessary SnowPark libraries
*Note: You can also import libraries through the Packages menu.

Step 2. Create a SnowPark session.
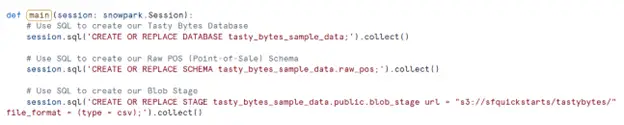
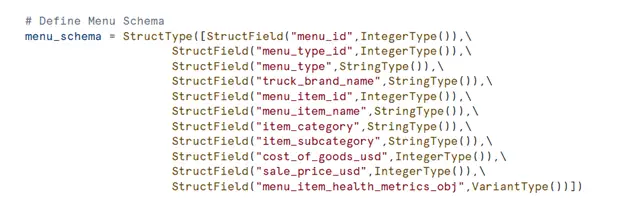
Step 3. Define the Schema. Include columns and data types within the schema.
Step 4. Create a DataFrame from the Stage and save it as a table in the database and schema.

Step 5. Create a new DataFrame and return it.

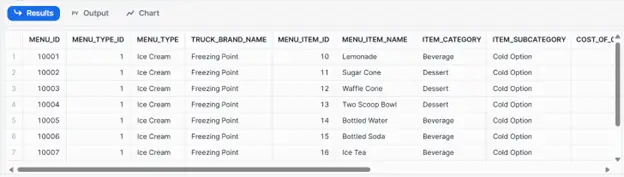
Step 6. Below are the results after you run the code.
Notebook Example
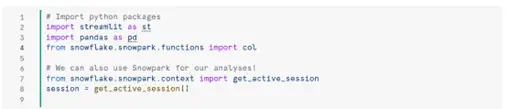
Step 1. Set up environment in Notebook
(Optional) Set Up the SnowPark Session
The Session object in SnowPark is the entry point to interact with Snowflake. However, in this example, we already have the session set up for us as the session is often pre-configured through tutorials or the trial version. But in case you need to set it up on your own, here’s how to initialize it:

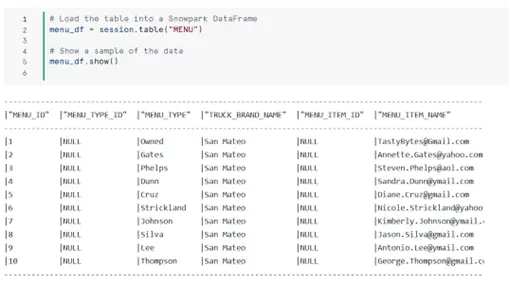
Step 2. Exploring the Table
You’ll first load the table into a SnowPark DataFrame. You can also perform joins using SQL. You can use the DataFrame API to join multiple tables or write a SQL statement and load the result set into a DataFrame using session.sql(). This gives you flexibility whether you prefer using Python or SQL for complex joins.
Step 3. Basic Data Operations
Let’s perform some common operations:
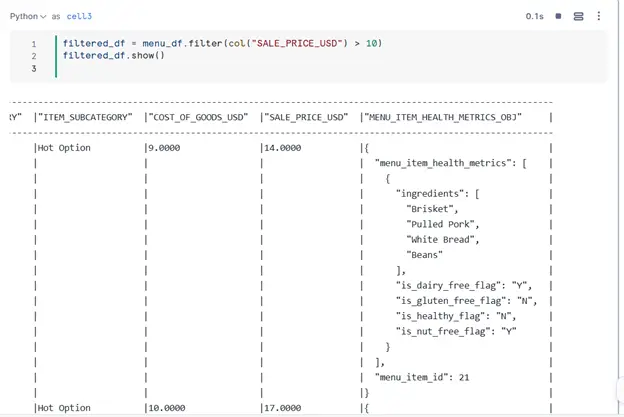
- Filter rows: Filter menu items with a SALE_PRICE_USD greater than $10.
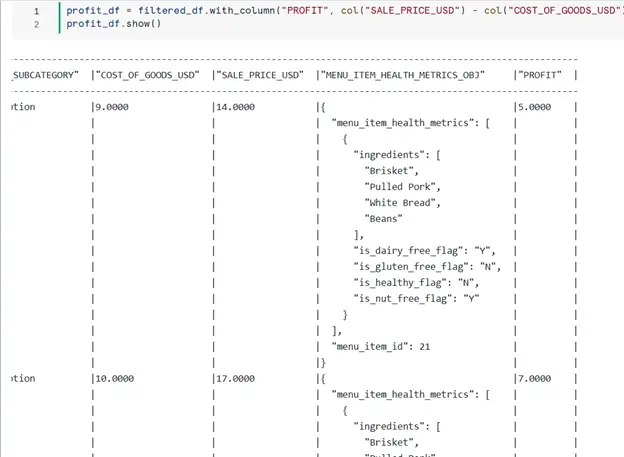
- Add a new column: Add a profit column (PROFIT = SALE_PRICE_USD – COST_OF_GOODS_USD).
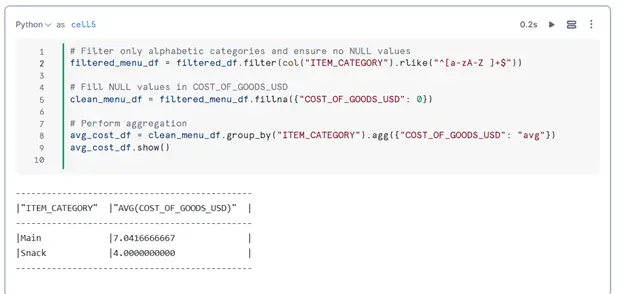
- Group and Aggregate: Calculate the average cost of goods by ITEM_CATEGORY.
- Sort Data: Sort menu items by SALE_PRICE_USD in descending order.
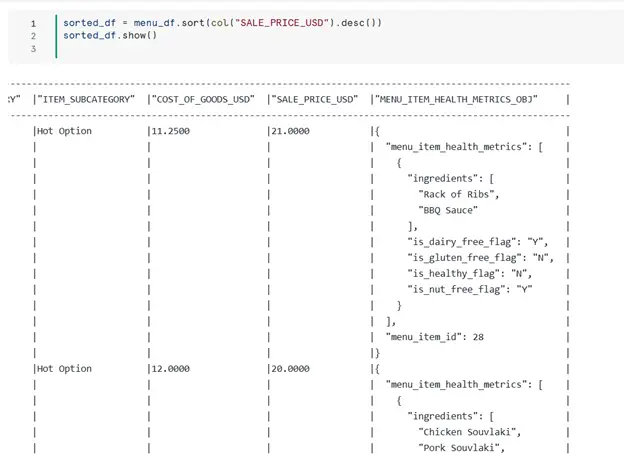
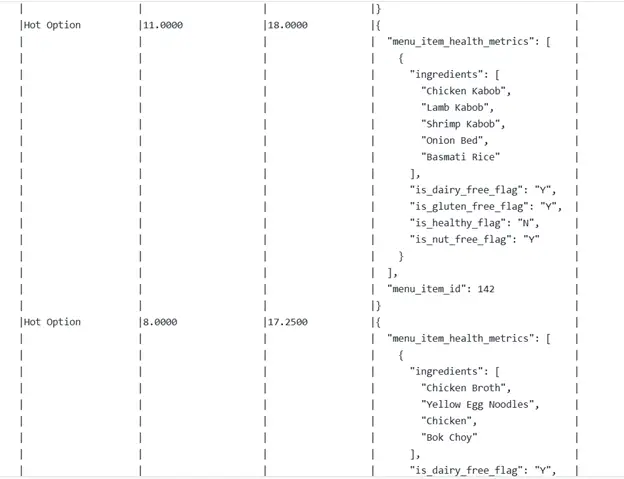
Step 4. Working with Nested Data (JSON Objects)
The table contains a MENU_ITEM_HEALTH_METRICS_OBJ column (VARIANT type). Variants are semi-structured data types that can store formats such as JSON, XML, and more. But it is mainly used for JSON objects. Variants can hold different data such as objects, arrays, and even simple values. Here’s how to extract data:
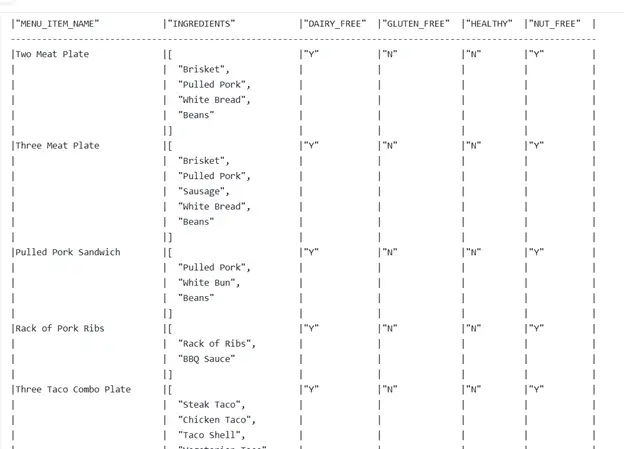
Example: Extract a specific key from JSON object and implement a filter to find items that include nut-free and dairy-free ingredients.

Step 5. Save Results to a New Table and Clean Up
You can persist the results into a new Snowflake table. This is useful when you want to save transformed data for future use to avoid redundancy and improve performance. This way future analyses can query pre-process data, other teams (eg. Analytics) can access the clean dataset without needing to rerun the code, and avoids unnecessary computation. When you’re done, close the session to free up resources.

Conclusion
With SnowPark, you can leverage Python’s simplicity and Snowflake’s processing capabilities to build scalable and efficient data workflows. In this tutorial, we covered the basics of setting up SnowPark, querying data from a Snowflake table, using operations and saving transformed data.
At PMsquare, we leverage SnowPark to deliver insights for our clients. If you’re interested in learning more or seeing how to integrate SnowPark in your environment, don’t hesitate to reach out to us.
Happy coding everyone!
Next Steps
To stay ahead with the latest updates and best practices, be sure to subscribe to our newsletter for expert insights delivered directly to your inbox.