
Share


Oliver Feldenberg, September 2, 2024
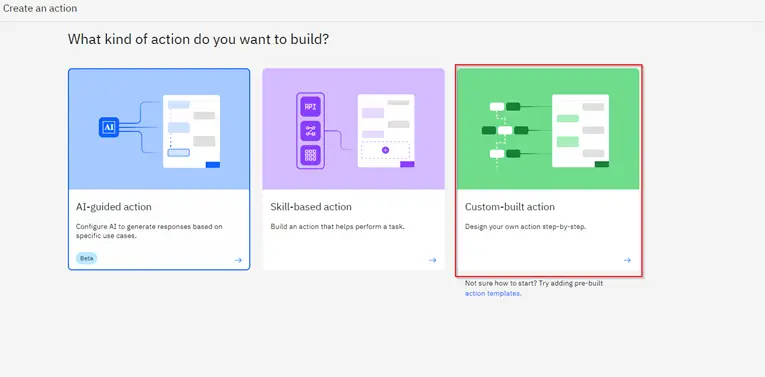
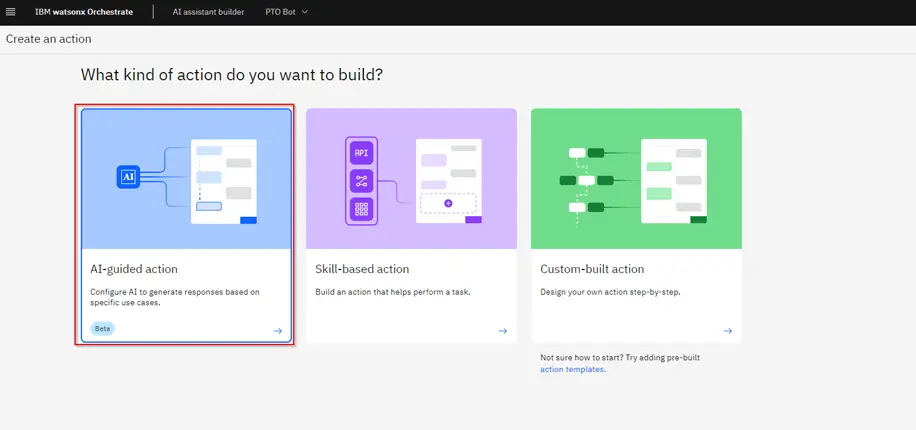
A major aspect of IBM Watsonx Orchestrate is allowing users to use natural language inputs to complete tasks across applications. The platform completes this with AI assistants, which builders create and customize to cater to the specific business cases of the organization. Within the Orchestrate environment, the activities called by natural language are called Actions. Builders can create, combine, and reuse actions to perform a wide variety of tasks for the users. There are three kinds of actions that your builder can create: skill-based actions, custom-built actions, and AI-guided actions. In this article, we will explain what each type of action does and how your builders can make them.
Get the Best Solution for
Your Business Today!
Table of Contents
Create an AI Assistant
Before we start making actions, you will need an AI Assistant to add your actions to.
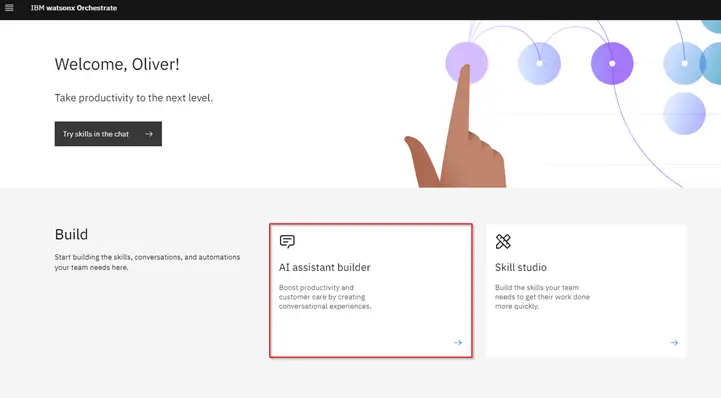
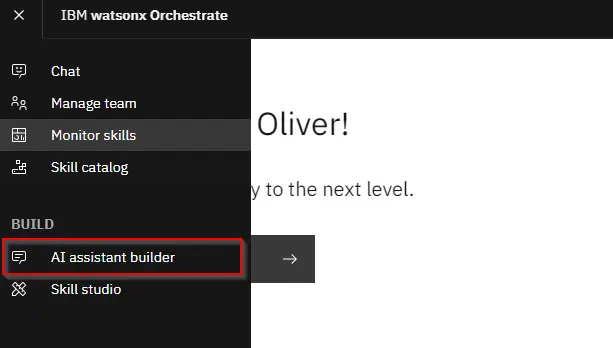
As a builder, access your Watsonx Orchestrate environment. From the home page, select the “AI Assistant Builder” option.
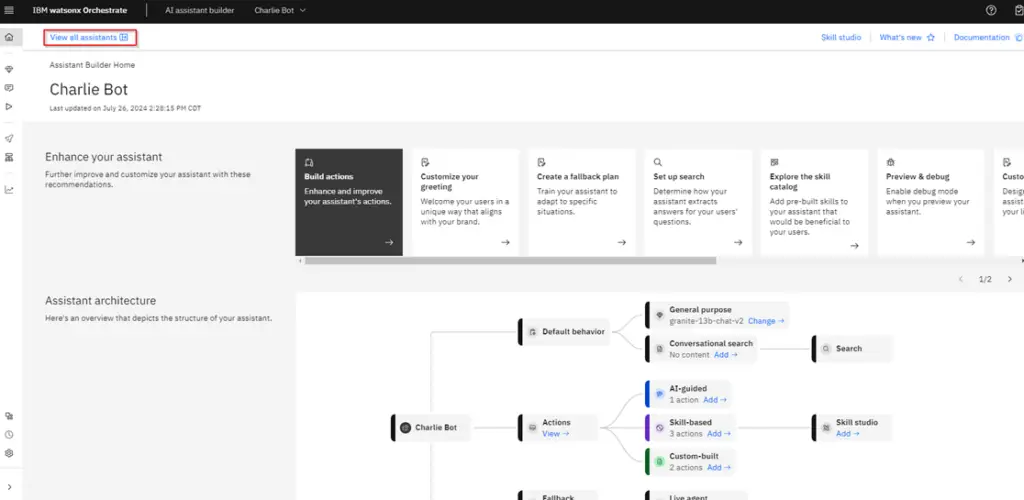
On this homepage, near the top of the page, select “View all assistants”. If you already have assistants in your environment, this is one way of accessing them.
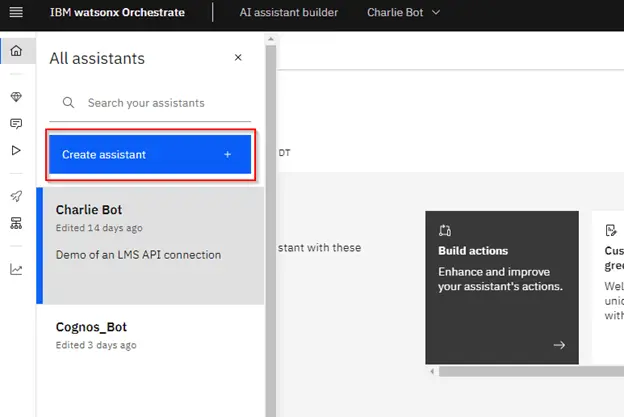
Select the blue button that says, “Create Assistant”.
You will now be taken to a screen that asks for a name, description, and language. For this example, we are naming our assistant “PTO Bot.” For the description, we can say, “This assistant handles employee PTO requests and basic PTO questions.” We can leave the language as English. Select “Create assistant.”
Now, we can start discussing actions.
Custom-Built Actions
Custom-built actions are conversation flows which can be explicitly defined in Watsonx Orchestrate. These actions can link to and from the other types of actions to build increasingly complex solutions to user requests.

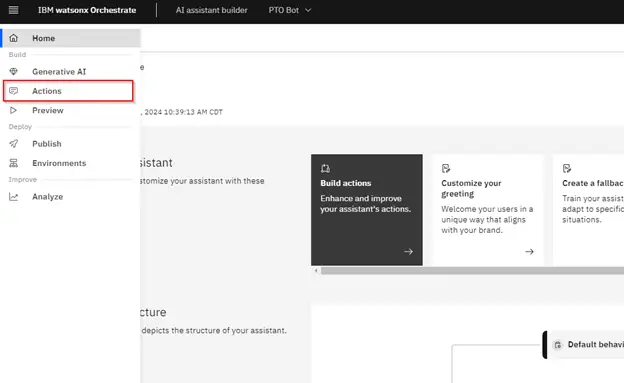
In the homepage of your PTO Bot assistant, expand the left ribbon menu and select “Actions”.
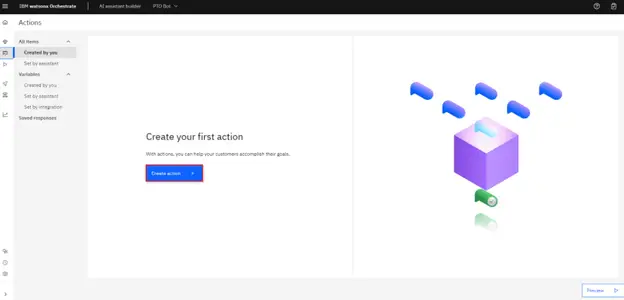
Then select “Create Action”.
Choose “Custom-Built Action”.
You’ll be prompted to enter text to answer, “What does your customer say to start this interaction?” For our answer, type “Request PTO.” Select “Save.”
Now you’ll be able to design your action. If you want to add more phrases to begin the action, select the “Customer starts with” pane, and you’ll see a screen where you can add as many example phrases as you’d like. It’s recommended to use at least ten to allow the AI to train on the phrases and detect slightly varied versions that your users may end up trying.
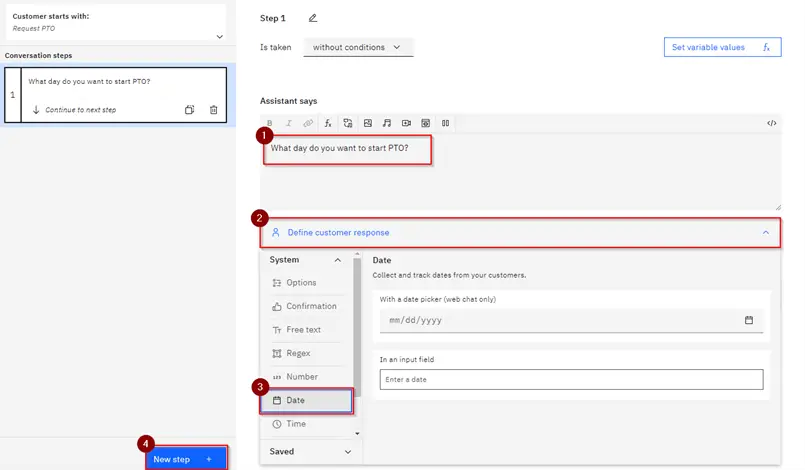
Once you’re done adding phrases, select the first step under “Conversation Steps”.
Under “Assistant says,” you can define what your assistant will return for this step. There are multiple ways the assistant can respond, but this will just be a text response for now. Type, “What day do you want to start PTO?”
Expand “Define Customer Response” and select Date.
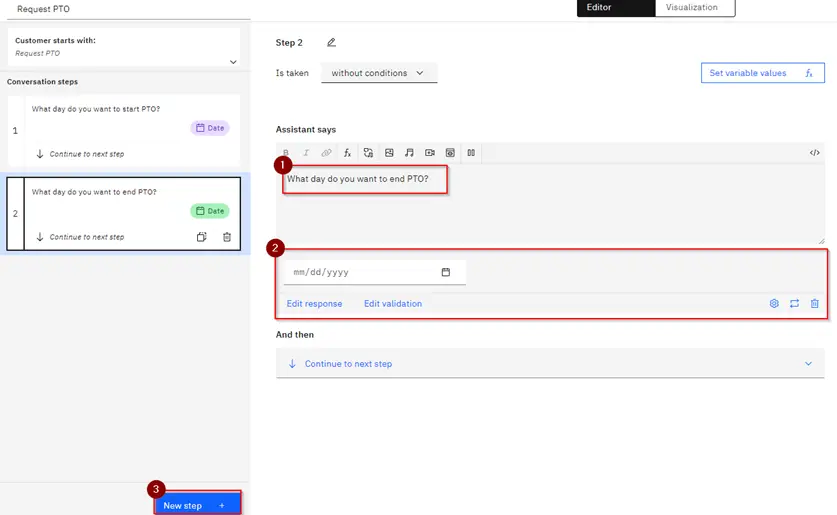
Near the bottom left side of the page, select “New Step”.
In this new step, our assistant will say, “What day do you want to end PTO?” Define customer response as a date once again and create a new step.
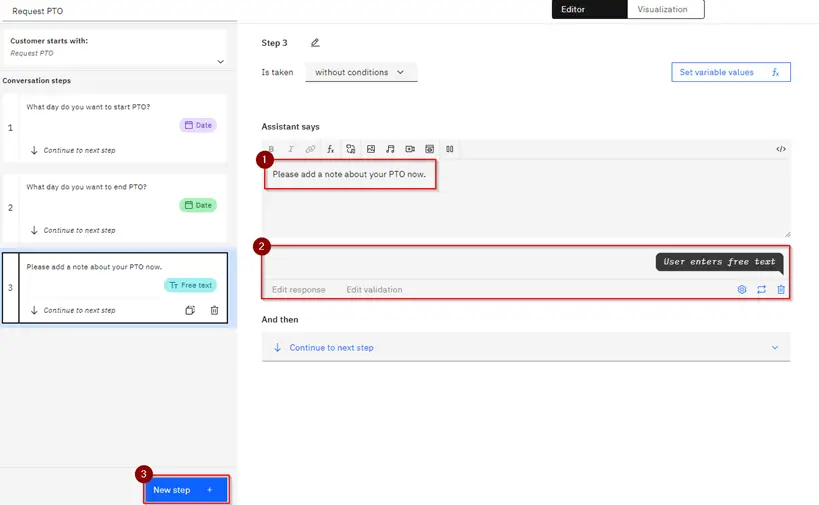
In your third step, have the assistant say, “Please add a note about your PTO now.” This time, under “Define Customer Response,” select the free text option to allow your user to type in an answer. Create a new step.
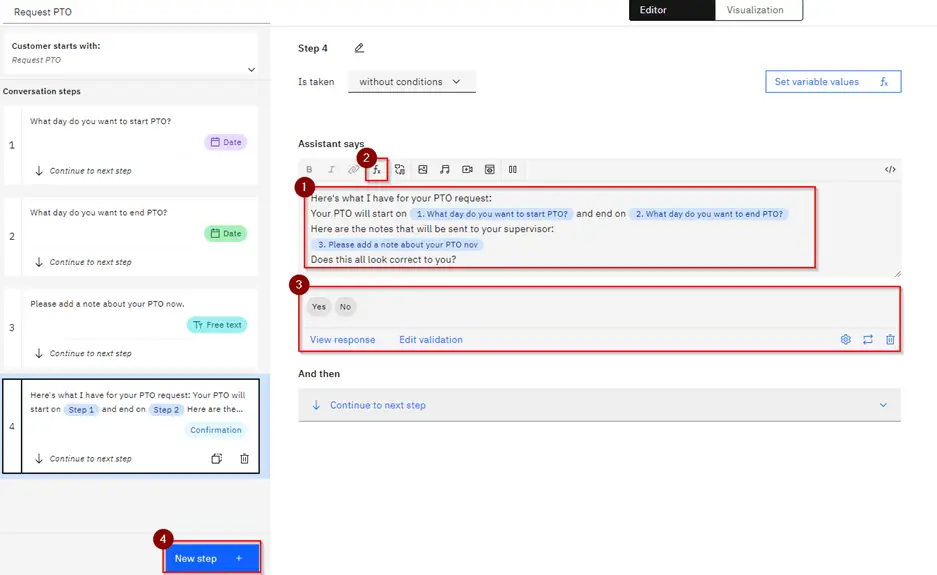
In this step, we are going to take what your user has said and confirm the information with them. To accomplish this, we will take advantage of the fx button while writing what the assistant says. When you click on the fx button, select “action step variables”. This will show you your previously created steps. When you choose one of these variables, you will be referring to the user’s answer to that step.
Here’s what you will type, with brackets being where you will use the function button to add your action step variables:
“Here’s what I have for your PTO request: Your PTO will start on [Action Step 1] and end on [Action Step 2]. Here are the notes that will be sent to your supervisor: [Action Step 3] Does this all look correct to you?”
(Hint: hitting enter will add line breaks to your assistant’s chat, allowing for some basic formatting).
Under “Define Customer Response”, select the confirmation option. This allows your user to decide either “yes” or “no.” Create a new step.
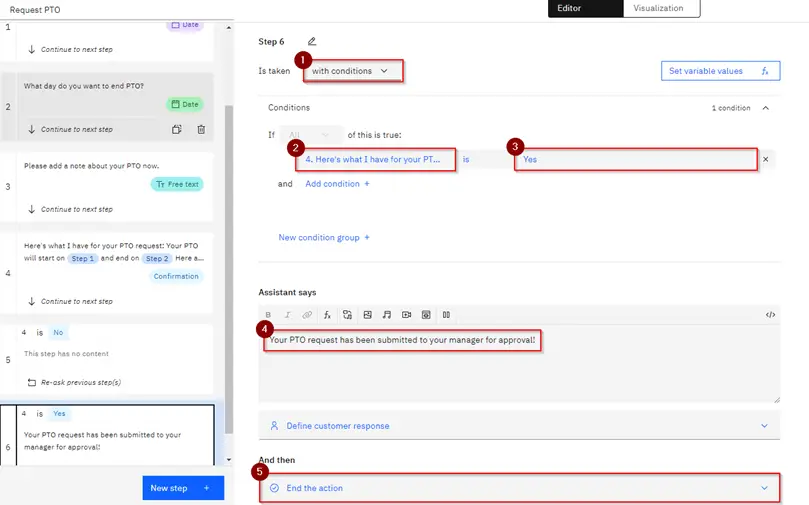
In this step, select the “Is Taken” dropdown and select “With Conditions.” Make sure action step four is chosen and is set to “no.” This step will only run if the user replies no to the previous step.

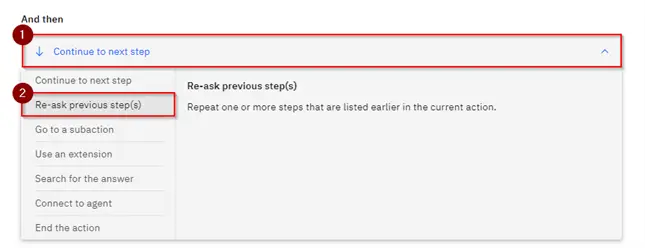
Skip past “Assistant says” and select the “And then” dropdown.
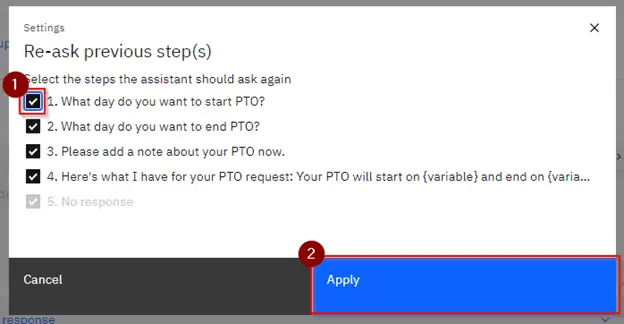
Previously, we had each step move on to the next one, but there are other options we can choose here. Select “Re-ask previous steps.”
In the popup window, select the checkbox for the first step. All steps from the first to the current should automatically be selected when you do this. Select “Apply.” Now, if a user decides that the information they entered was incorrect, they will go through the questions again.
Create a new step. Set the “Is Taken” dropdown to “With Conditions” once again. This time, set action step four to “yes.” Under “Assistant says,” write, “Your PTO request has been submitted to your manager for approval!” Under “And then,” select “End the Action.”
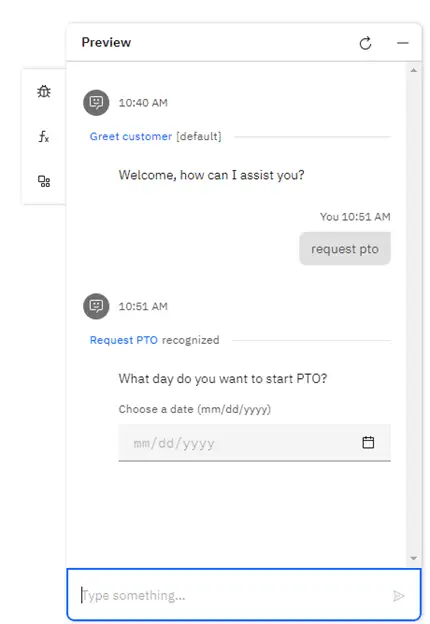
At the bottom right of your AI Assistant Builder window, select the “Preview” button. This allows you to test out your action and verify that it functions as expected. Try inputting your information and go through at least twice to test the “no” and “yes” branches of your action.
You can also click the “Visualization” tab next to the “Editor” tab to view a flowchart of your action. Notice how the steps flow in a straight line until step four, where it creates a new branch.

Skill-based Actions
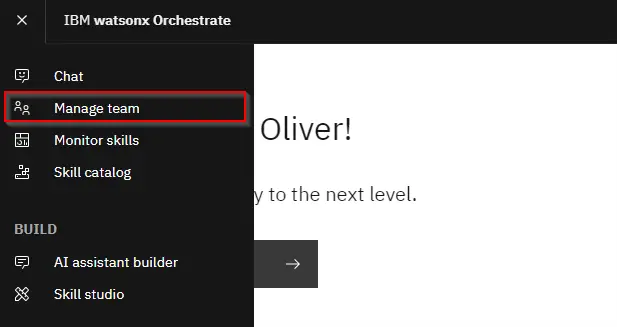
Skill-based actions are actions in your Assistant that directly invoke a skill. You can use these actions for prebuilt skills in Watsonx Orchestrate, or for automations created by builders. To use skills in your AI Assistant, you must connect the app and skill. This will require an account with admin privileges.As an admin, select the hamburger menu in your Watsonx Orchestrate environment and choose “Manage Team.”
Navigate to the “Skill set” tab, “Connections” subtab and choose “PTO Bot live” in the dropdown menu.
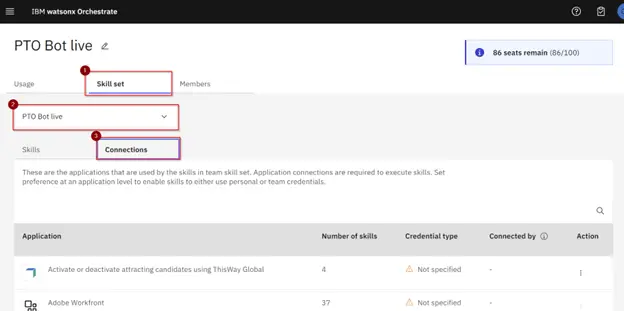
Navigate to Microsoft Outlook and select the kebab menu, then “Connect App”

Currently, skill-based actions only permit team credentials. This means that when you use skill-based actions in your AI assistant, you will want to use an account that your security team permits all users to have access to. Be sure to take this into consideration when you decide who the users are for an AI assistant and what potential security you place around access to the assistant.
For example, an AI assistant meant only for your employees could be embedded in your company portal behind the employee login. This would help ensure that the team credential is only used by actual employees.
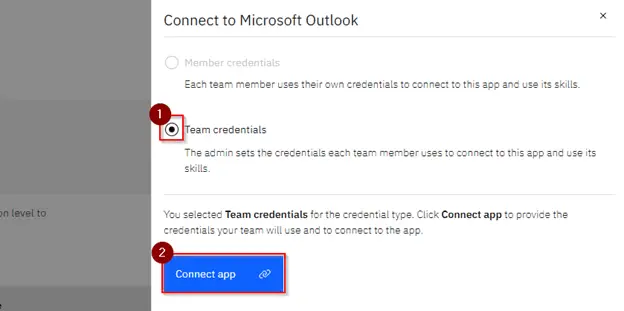
Make sure “Team credentials” is checked and click “Connect app.”
For type, choose “Non-admin user” and proceed.
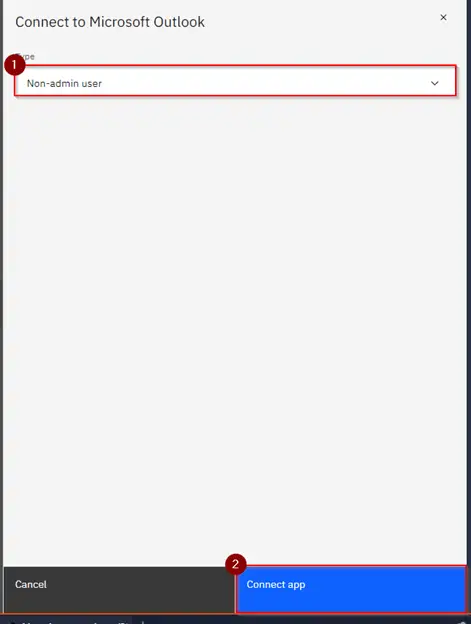
You should get a notification confirming Outlook was connected successfully.
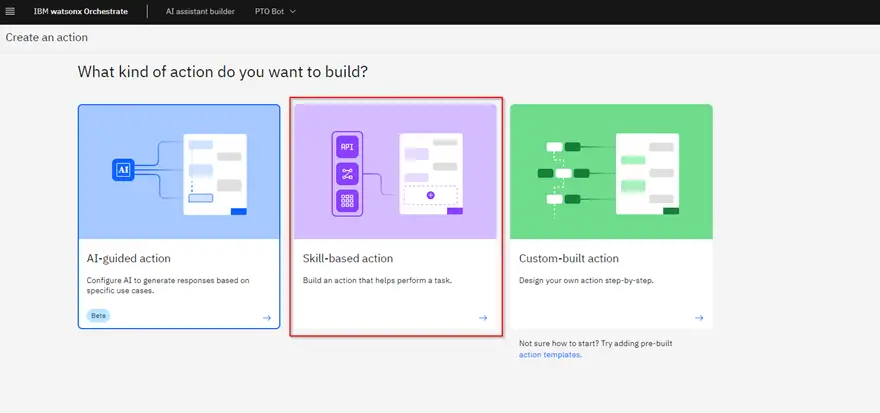
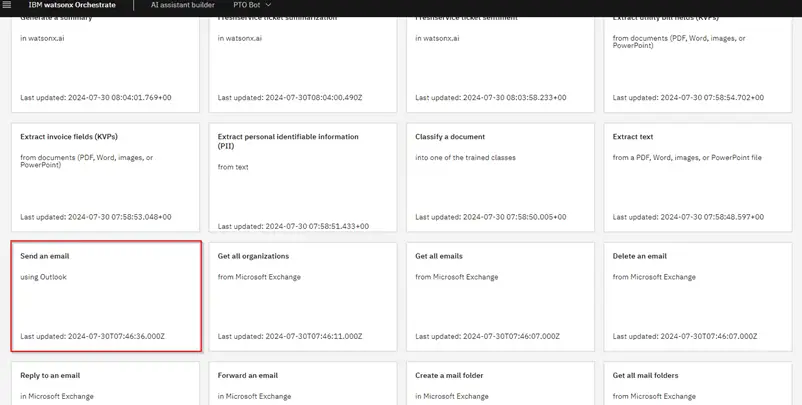
In the actions page of your AI Assistant, select “New Action” and “Skill-based Action.”
Scroll until you find “Send an email” and select it.
Click “Next”.
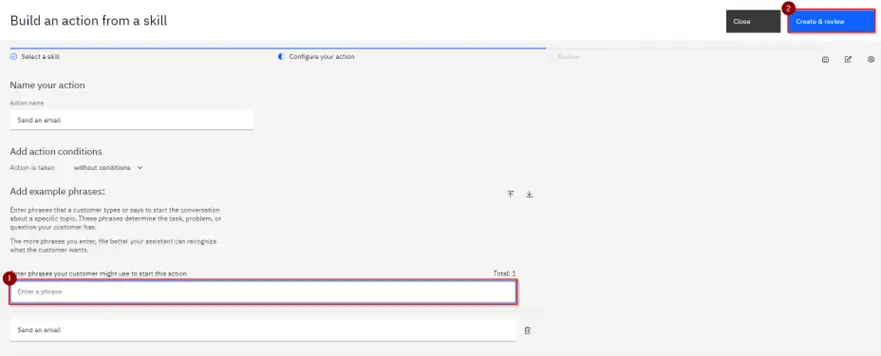
Now, name your action and add example phrases. You can keep the “Send an email” name, but you will need to add example phrases. Like the previous type of action, use phrases that your users might use to call for this skill and try to include at least ten to train the AI to detect more effectively. Select “Create and Review.”
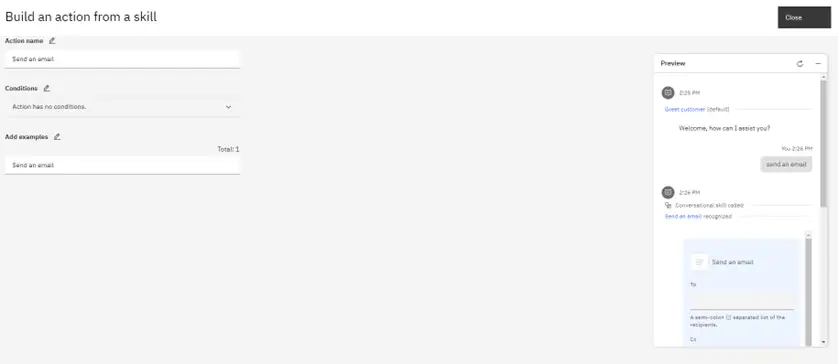
You can preview your action like you can with Custom-built actions. Use one of your example phrases and try out the action. Pick an email address you can check to verify that the email was sent. Select “Close” when you are done.
AI-Guided Actions
AI-guided actions allow the use of LLMs (Large Language Models) to reference a body of knowledge and provide answers to natural language questions from the user.
In the actions page of your AI Assistant, select “New Action” and “AI-Guided Action.”
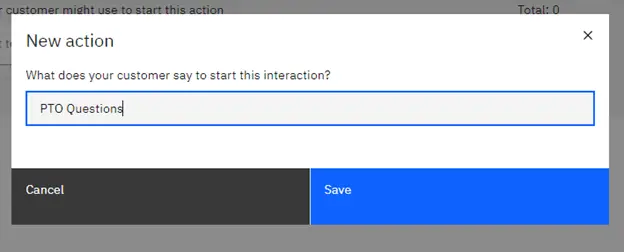
You will be prompted to add example phrases to prompt this action. Type “PTO Questions” and select “Save.” Once again, you can return to the “Customer Starts With” card to add more phrases.
Select the card under “Configuration.” You can select a model by clicking the dropdown menu at the top of the page. Select the “llama-3-70b-instruct” model. Consider testing different models when making AI-guided actions to determine which works best for your use case.
Next, under “Add Knowledge,” paste in this text. This file contains a fictional PTO policy that the AI Assistant will reference when answering questions.
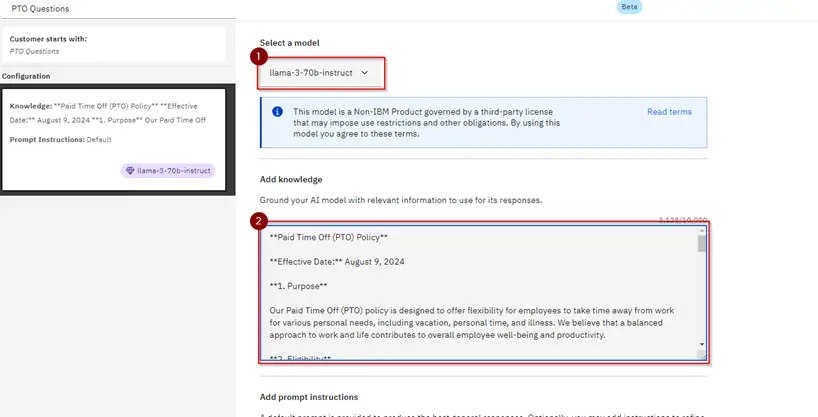
Feel free to read this document and note how the assistant references this information. Notice the character limit for the AI-guided actions in this section. Remember that when you create these kinds of actions, you may want to logically separate source text based on how you believe users might group the information to meet the character limit.
Next, under “Add Prompt Instructions,” paste the quoted text: “Cite the section of the text the answer is taken from at the end of the answer.”
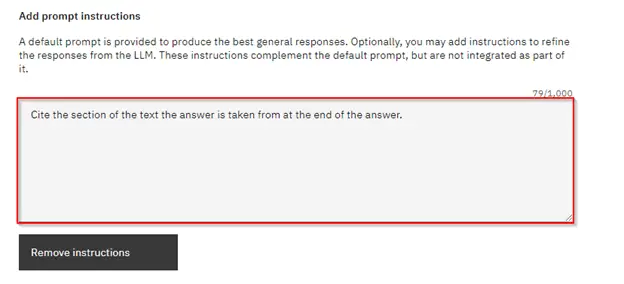
Consider how different prompt instructions may affect the assistant in answering questions. Instructions have a smaller character limit than knowledge, so be sure to write concisely. Experiment with wording your instructions in different ways or adding or removing instructions to see how the assistant changes its answers.
Finally, preview the action by selecting the “preview” button in the bottom right corner. Try asking different questions to see how the assistant responds.

The AI-guided action may seem to require less on the builder end but remember to test the action thoroughly to get a strong idea of how the assistant will answer your user’s frequently asked questions. LLMs will respond to prompts differently and changing your source knowledge and instructions also affects the quality of the assistant.
Notes:
Text File for assistant knowledge.
Conclusion
Now that you have created all three kinds of actions in the AI assistant, you can try creating actions that fit your use cases. Experiment with solutions within all the action types and see how they can complement one another to build an engaging and helpful AI assistant.
For more advanced uses of the actions or for clarifications on the actions explained in this article, reach out to the PMsquare team and see how we can help you along your organization’s AI journey. You can also let us know what you want to learn about Watsonx Orchestrate in our future blogs or videos! In the meantime, check out this livestream showcasing watsonx Orchestrate skills.
And don’t forget to sign up for our monthly newsletter to get articles like this, new videos, and other news delivered straight to your inbox!
Published Date: