
Share


Paul Mendelson, July 10, 2023
Get the Best Solution for
Your Business Today!
The “Glass” interface in Cognos is extremely flexible, and with a bit of effort can modify Cognos to the point it becomes unrecognizable. From simply adding new tabs on the home page, buttons on the appbar, adding new views, sideloading CSS, new widgets for dashboards, or even kicking off a JavaScript application as soon as the user logs in the potential is unlimited. Cognos 12 introduces a new feature that makes this significantly better.
Let’s start with a super basic extension, adding tabs to existing perspectives. The API on the IBM site is super helpful here.
Table of Contents
Adding New Tabs and Buttons
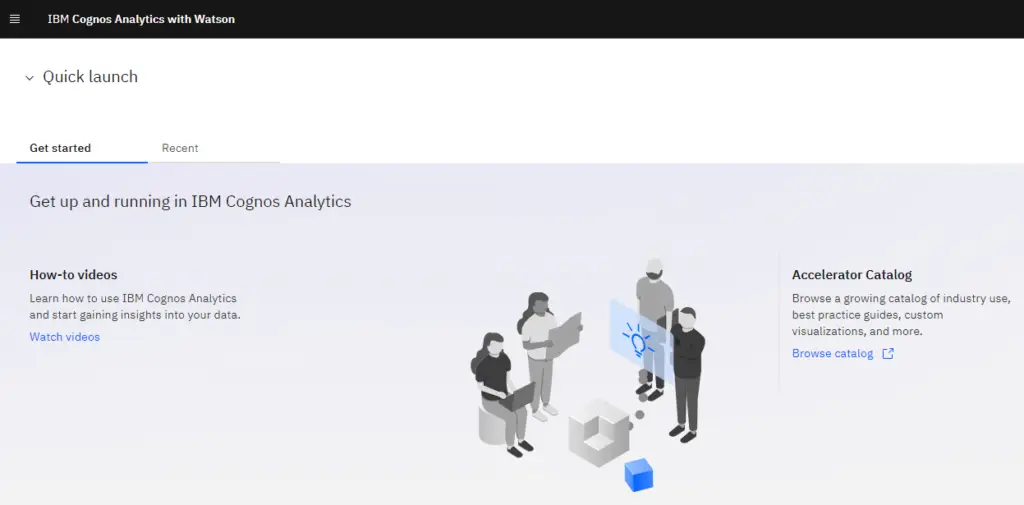
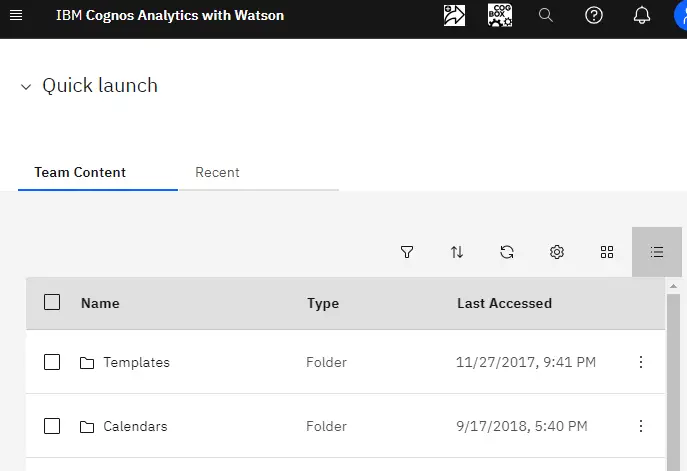
The default home page looks like this (with the welcome screen turned off). We want to add a button to open the public folders content:
Now we start on the spec.json (the file that describes the changes we want to make).
First off, this is a JSON object. A super quick primer:
Brackets {} are objects. Each object contans key/value pairs.
Square brackets [] are arrays. Each array contains comma separated strings, Booleans, numbers, objects, or even more arrays.
Keys are “strings”.
Values can be any of the above, objects, arrays, strings, numbers, or Booleans.
To begin, we need to have the following structure:
{ "name":"myExtension", "extensions": []}Both name and extensions are required. The name is what will appear in the list of extensions in the Manage menu, and the extensions describes what we’re doing. If we forget that, we’re not actually doing anything. Notice that extensions is an array, so with a single file we can add a number of new features to Cognos.
The extension object (the objects that go into the extensions array), looks like this:
{ "perspective":"home" , "features":[]}The perspective indicates which view we’re affecting. In this case we’re going to be modifying the home view. The features is the actual list of items we’re adding (or removing).
And the feature object itself:
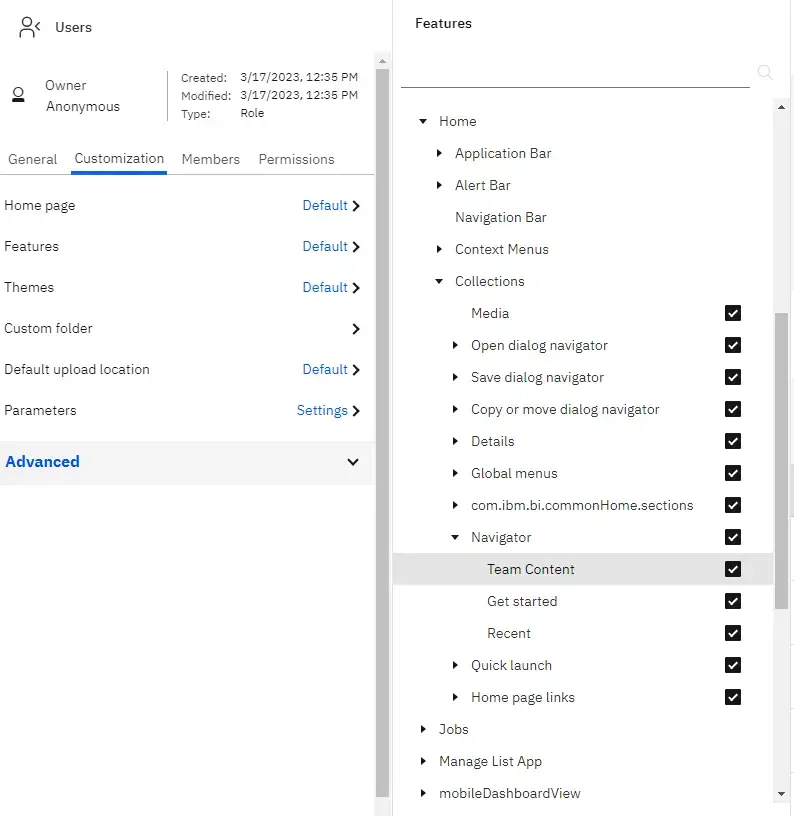
{ "id": "myCustomTab", "collectionItems": [ { "id": "com.ibm.bi.caHome.navigator.teamContent", "containerId": "com.ibm.bi.caHome.navigator", "label": "Team Content", "lensable":true, "weight": 500, "properties": { "path": ".public_folders", "toolbar": [ "filter", "sort", "refresh", "settings" ], "listOptions": true } } ]}“collectionItems” is the array of UI items we’re adding to the view. The “containerId” instructs Cognos where to put it, in this case it’s a tab in the navigator on the home page. “lensable” adds the item to the list of available UI items that can be toggled through the manage window.
Removing Tabs and Buttons
The weight determines where on the navigation bar it appears. The higher the number, the more to the left it is positioned. The leftmost item will be initially selected. The property object instructs Cognos how to use the items. Here we’re looking at the root of team content. If we wanted to show the user’s My Folders we could use “.my_folders” instead. The toolbar array lists the available buttons at the top, and “listOptions” is the toggle for list view vs tile view.
This looks great, but now I want to hide the “Get started” item. Directly after the “collectionItems” (remembering to put a comma) we can add the “excludeItems” array. In order to find the ID we need to use, let’s use the browser’s developer toolbar to examine the HTML:
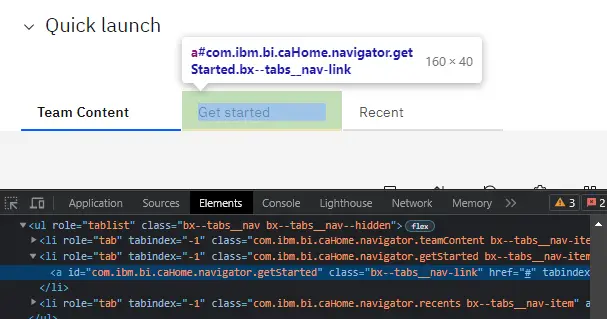
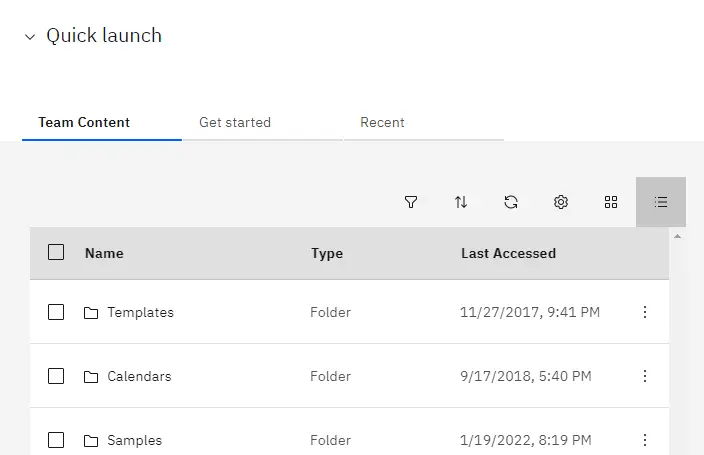
Once we have that we can add “excludeItems”:[“com.ibm.bi.caHome.navigator.getStarted”] and checking in Cognos again we see:
Beautiful! We’ve modified the Home screen to add a new tab and remove an old one. The full JSON so far:
{ "name": "myExtension", "extensions": [{ "perspective": "home", "features": [{ "id": "myCustomTab", "collectionItems": [{ "id": "com.ibm.bi.caHome.navigator.teamContent", "containerId": "com.ibm.bi.caHome.navigator", "lensable": true, "label": "Team Content", "weight": 500, "properties": { "path": ".public_folders", "toolbar": [ "filter", "sort", "refresh", "settings" ], "listOptions": true } }], "excludeItems": ["com.ibm.bi.caHome.navigator.getStarted"] }] }]}As of Cognos 12 there’s a new feature! We can conditionally execute these extensions based on a number of different options. Let’s say that we’re adding a dropdown menu in the appbar with a list of reports, but each item in that menu should only appear for people in a specific group. In Cognos 11 that was incredibly difficult to do, but with the new environment option it becomes trivial.
Adding a Dropdown Menu with a Specific List
To make this we simply need to add another object to the extensions array:
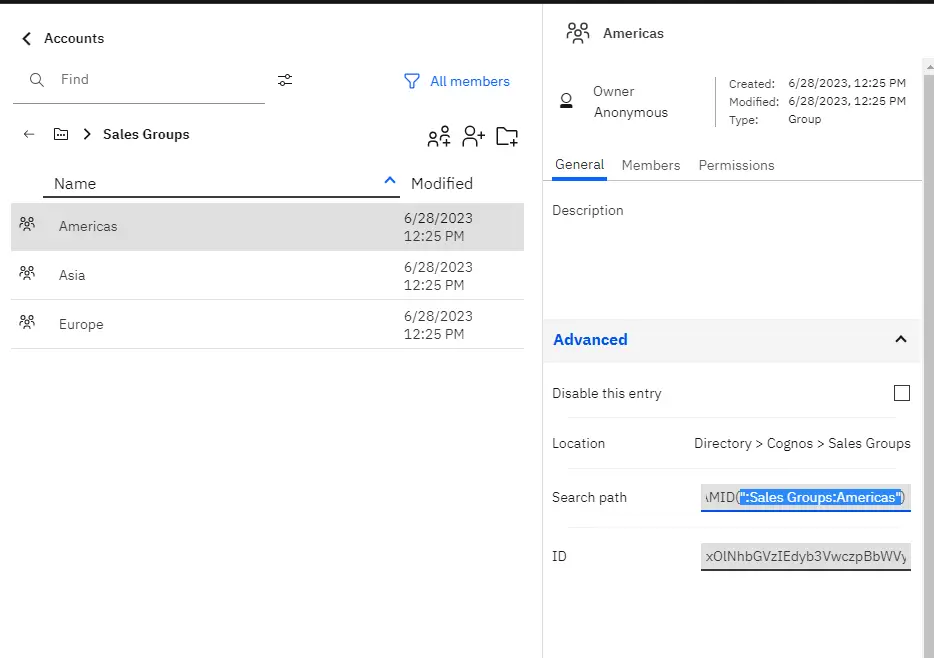
{ "perspective": "common", "features": [ { "id": "securedMenuList", "toolItems": [ { "id": "appbar.trailingGroup.securedMenuList", "environment": { "groupsAndRoles": [ ":Sales Groups:Americas", ":Sales Groups:Asia", ":Sales Groups:Europe" ] }, "containerId": "com.ibm.bi.glass.appbarTrailingGroup", "title": "Sales Reports", "type": "Menu", "coachMark": { "title": "Sales Reports", "contents": "The coach mark is the little blue icon that appears as a guide for users." }, "icon": "list--bulleted_32_v7", "weight": 350 }, { "id": "securedMenuList.Americas", "environment": {"groupsAndRoles": [":Sales Groups:Americas"]}, "containerId": "appbar.trailingGroup.securedMenuList", "label": "Americas", "type": "MenuItem", "weight": 300, "actionController": "bi/glass/api/ReportOpener", "options": {"path": ".public_folders/Sales Reports/Sales Report Americas"} }, { "id": "securedMenuList.Asia", "environment": {"groupsAndRoles": [":Sales Groups:Asia"]}, "containerId": "appbar.trailingGroup.securedMenuList", "label": "Asia", "type": "MenuItem", "weight": 300, "actionController": "bi/glass/api/ReportOpener", "options": {"path": ".public_folders/Sales Reports/Sales Report Asia"} }, { "id": "securedMenuList.Europe", "environment": {"groupsAndRoles": [":Sales Groups:Europe"]}, "containerId": "appbar.trailingGroup.securedMenuList", "label": "Europe", "type": "MenuItem", "weight": 300, "actionController": "bi/glass/api/ReportOpener", "options": {"path": ".public_folders/Sales Reports/Sales Report Europe"} } ] }] }Note the environment object is looking for “groupsAndRoles” with the string from inside the CAMID. You can find the correct string like this:
A user that has access to all of the items will see it as:
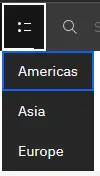
While a user who is only in one of the groups will only see one of the menu items. A user who isn’t in any of the groups won’t even see the menu button.
“perspective”:”common” means it will appear on every view that has the appbar. There are two basic items here. The first is the menu button itself. That is “type”:”menu”, it’s populated with menu items. Each menu item has it’s own “actionController”, with the options indicating how it behaves. The in-built action controllers are “ReportOpener”, “DashboardOpener”, “FolderOpener”, and “IFrameOpener”. You can also make your own controllers with JavaScript to do something when the user clicks on the button. Simply include the JS file in the zip, and call it with “v1/ext/myExtension/path/to/file”. You don’t need to add “.js” to the end of the file.
There is a ton of other capabilities that I haven’t even touched on yet, including a few that aren’t included in the official public API. I’m planning on a few of these articles, so the next one I’ll get into making proper JS extensions and will even get into adding your own custom service into Cognos.
Next Steps
We hope you found this article to be insightful and informative. If you have any questions about adding extension to Cognos or would like PMsquare to provide guidance and support for your analytics solution, contact us today. Be sure to subscribe to our newsletter for more PMsquare updates, articles, and insights delivered directly to your inbox.