
Share


Rory Cornelius, February 7, 2022
Get the Best Solution for
Your Business Today!
Back in version 11.1.1, IBM added a data security option for Data Server connections in a Data Module. You can select a security group or set of users and automatically apply a filter to a particular table. However, this is only for Data Servers. You can’t use it with any other source, including Data Sets. I’ve been in several situations where a client is hesitant to use a Data Set because of the lack of row-level security. While IBM doesn’t provide the same data security functionality for Data Sets and uploaded files, you can easily include row-level security using the queryValue macro function. Let’s step through how to do it using an example use case.
Table of Contents
For our example, we’ll pretend that we work for the BI team of a coffee shop company. They have several different sales outlets across the state of New York. We have received a request to provide a store-level Dashboard that the employees can use to see their sales data. It needs to dynamically filter the data to show only the store where the employee using the dashboard works. Speed is a major concern for this dashboard, so we put together a summarized Data Set. Now, how do we secure this Data Set to dynamically filter as needed? Let’s go through the steps.
1. Determine what field(s) to use to secure the data
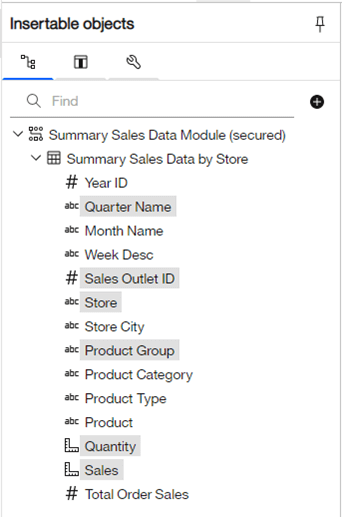
Here are all the fields in the Data Set. (This is based on the “Coffee sales and marketing” Data Module in the Cognos samples if you want to recreate it.) We need to limit the data based on the store of the person viewing the Dashboard. We could secure it based on Store but using an ID to filter is best practice. In this case, we need to use the Sales Outlet ID field.

2. Next, we create a security group with the users that should only see the secured data
If a security group doesn’t already exist in Cognos or our authentication provider for store employees, we need to create one.

Here I created a Cognos group called “Coffee Security Group” and added three members to the group. I’m using our training server for this example, so our users are student1, student2, and student3.
3. We need to create a mapping between User and the IDs of what they have access to
a) This could be in a database table or an uploaded spreadsheet
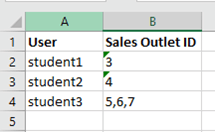
In this case, I created an Excel spreadsheet with two fields. The first is the username, and the second is a comma-separated list of the Sales_Outlet_ID’s that the user should have access to. I uploaded this file into Cognos. If it needs to be updated later, just update the spreadsheet and reupload. Make sure to save the uploaded file in a secure area where it can’t be updated by regular users.
4. Add the security mapping table to the Data Module
a) You’ll likely also want to hide this table. End users will not need to see the security table.

5. Add filter via expression editor to the table(s) that need to be filtered
a) Ideally, this would be able to go on the Fact table along with the appropriate dimension, but depending on the field, it may only be in the dimension. In this case, we only have the Summary Sales Data Set, so we apply it to that table.
b) Here is the full filter to apply, but let’s step through it.

6. Breaking down the filter:
The first part has:
'Coffee Security Group' not in ( #CSVIdentityNameList ()# ) The CSVIdentityNameList macro function provides a comma-separated list of all the groups and roles of the currently logged in user. This overall expression will return TRUE if the current user is NOT in the “Coffee Security Group”. Basically, if the current user is not in that group, don’t filter anything. This is like 1=1 type filter. If we only wanted people that are in the security group to be able to see any data, then we could remove this part.
The second part of the filter includes two pieces.
‘Coffee Security Group’ in (#CSVIdentityNameList()#)and
Sales_Outlet_ID in ( #queryValue(‘CustomSecurity.Sales_Outlet_ID’, ‘CustomSecurity.User_ = ‘ + sq($account.personalInfo.userName) )#)The first is for users that are in the “Coffee Security Group”. If they are in the group, then we want to filter by the second part.
This second part is where our custom security tables come in. We want to filter the Sales_Outlet_ID based on the user. In this case, the queryValue macro function works very much like a Parameter Map. You pass in a userName and get back a comma-separated list of Sales_Outlet_ID’s. The first parameter is the field that you want to be returned, including the Data Module identifier for the table. The second parameter is the where-clause or filter that’s used to get that value. In this case, we want to get the Sales_Outlet_IDs from our custom security file that we uploaded, so the first parameter is “CustomSecurity.Sales_Outlet_ID”. We want that for the user that’s currently logged in and viewing the dashboard or report. The filter clause limits the results to only where the CustomSecurity.User_ field in the uploaded file is equal to the current userName. The “sq” function just adds a single quote around the session parameter $account.personalInfo.userName resulting in something like: CustomSecurity.User_ = ‘student1’
Keep in mind, the queryValue function will only return one value. If you make a filter clause that results in multiple rows, it will only return the first value. If multiple values are needed, make it into a comma-separated list like “student3” in our example. The Sales_Outlet_ID returned for that user is “5,6,7”.
7. Now that we have the Data Module created, let’s create a test report to make sure the filtering is working as expected.
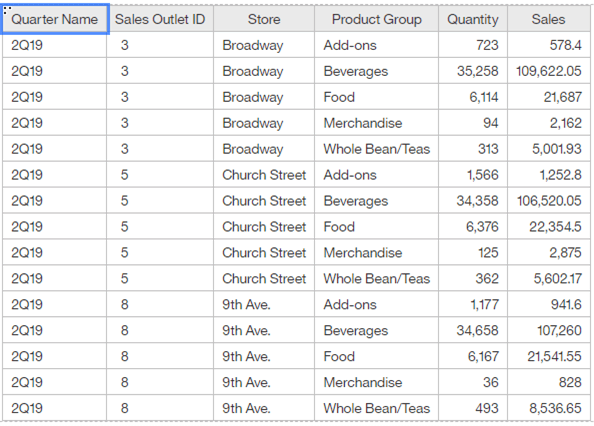
a. Select the following fields for an example report.
As long as you’re not one of the users being filtered, you should see everything in the report:
b. Save the report in a test location
c. Log out and log back in as one of the test users.
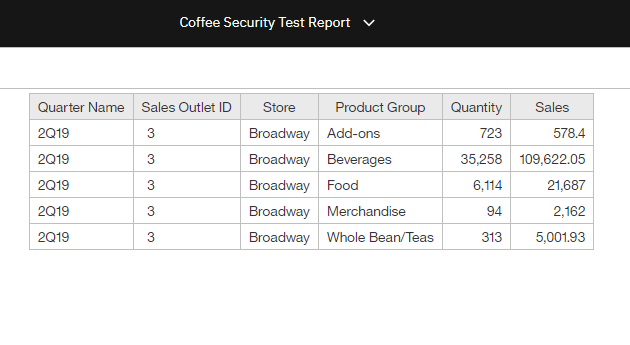
Running the test report shows only the Sales Outlet ID’s for that user
If I open the report in Edit mode and view the Cognos SQL for this query, this is what I get in the where clause:
WHERE NOT ( 'Coffee Security Group' IN ( 'All Authenticated Users', 'Analytics Explorers', 'Coffee Security Group', 'Cognos', 'Everyone', 'Student1', 'training' ) ) OR 'Coffee Security Group' IN ( 'All Authenticated Users', 'Analytics Explorers', 'Coffee Security Group', 'Cognos', 'Everyone', 'Student1', 'training' ) AND Query1_001.Sales_Outlet_ID IN ( 3 ) )You can see how the filter we created was generated showing all the groups/roles from the CSVIdentityNameList macro function and the “3” in the in-clause from the queryValue function. These will be dynamically generated for each user that logs in resulting in only show the data they’re supposed to see.
Conclusion
As you can see, setting up row level security for Data Sets, uploaded files, or other Data Modules is pretty easy even if it isn’t natively supported through the Data Security functionality like Data Server connections. It also shows how the queryValue macro function can replace many of the uses of Parameter Maps from Framework Manager. Keep this in mind as you develop more complex Data Modules.
Next Steps
We hope you found this article informative. Be sure to subscribe to our newsletter for data and analytics news, updates, and insights delivered directly to your inbox.
If you have any questions or would like PMsquare to provide guidance and support for your analytics solution, contact us today.