
Share


Dan Swan, May 13, 2024
Get the Best Solution for
Your Business Today!
Applications and Plans can be your gateway to a structured, systematic experience in Planning Analytics Workspace (PAW). That experience can include simply navigating to important reports and charts or it can give guidance to users contributing and approving budget entries. In other words, it can add a great deal of value to the cubes, views and other PAW assets you have by giving your users an easy, secure place to interact with their reports and plans. By definition, Applications and Plans let you organize interconnected PAW assets, such as books, views, and web sheets.
Table of Contents
An Application includes associated assets like books, views, and web sheets organized into sections. Sections can be aligned with your organization’s management structure, reporting or planning needs, or any other pertinent grouping of PAW assets. An application does not require or imply any actions, such as a submission or approval, linked to the assets or Sections within an application.
Within a Plan, assets are organized into tasks, which arrange specific activities or contributions essential to the completion of a planning or budgeting process. Each task may require data entry to the associated books, views, and/or web sheets for completion.
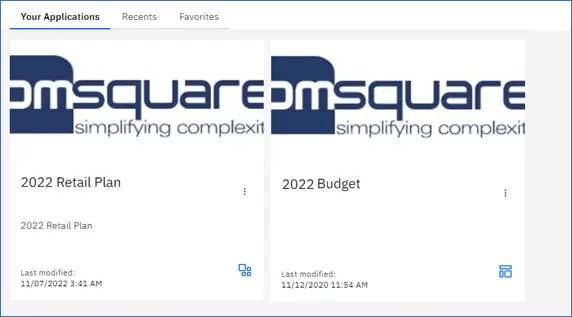
PAW administrators, analysts, and modelers are responsible for crafting Applications and Plans. The user who creates the Application or Plan has the ability to grant ownership permissions to other users. Upon logging in to Planning Analytics Workspace, the available Applications or Plans are displayed on the Your Applications tab at the bottom of the home page.
Applications are identified by the icon:

Plans are identified by the icon:

Control over access to sections within an application, or tasks within a Plan, is managed through user group assignments in PAW. Once a user group is assigned to a section or task, the security settings for the associated assets are updated to incorporate the assigned user group.
Security measures for Applications and Plans exclusively pertain to PAW user groups and roles, with no connections or reliance on TM1 object security. The PAW administrator is responsible for ensuring that the requisite TM1 security permissions for viewing and editing assets are granted to the associated Planning Analytics Workspace user groups.
This document is based on PAW release 11.8.02300.10, enablement release 93.
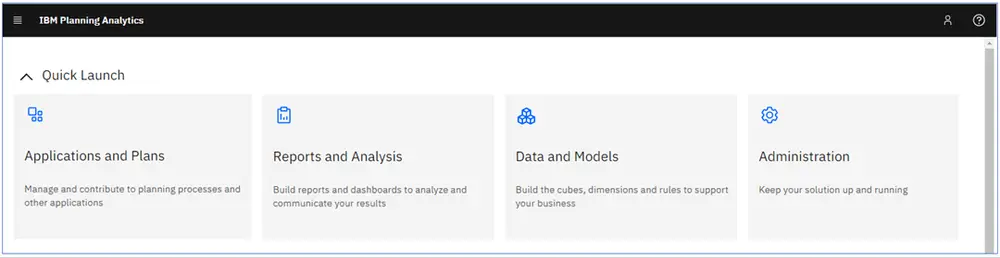
Navigating the Home Page
After signing on, Planning Analytics Workspace opens with the default Home Page as shown below.
Click on a tile and navigate to the Application, report, workbench or administration.
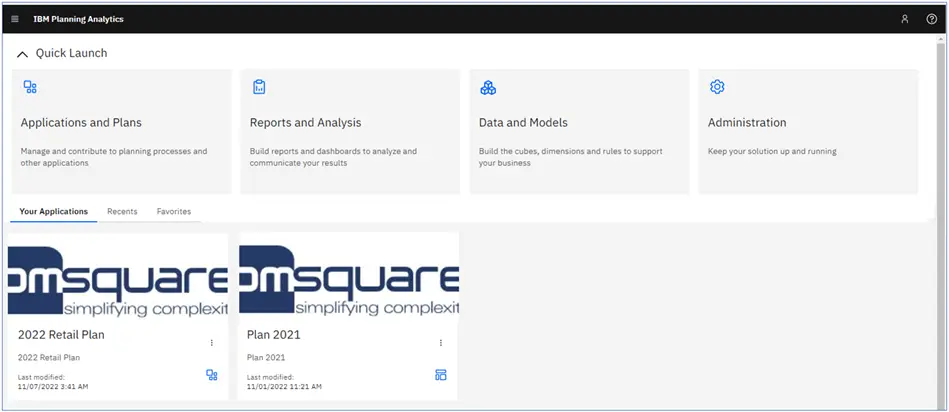
On the Home page, Administrators can see all Applications and Plans. Modelers, analysts and consumers can see open Applications or Plans, only if they are a member of at least one of the groups assigned to the assets within the Applications or Plans.
Applications will also appear under Your Applications on the Welcome page.
Creating Applications and Plans
Applications are dashboards which are designed to allow easy navigation to important reports and charts. PAW Books, views and web sheets are among the assets that can be used in an Application. Applications use Sections which allow you to logically group and arrange your reporting assets.
We built an Application for Finance that contains the Integrated Financial Statement book. The example below uses only one Section, but if required, we can create new Sections for this Application.

The only requirement for this application was to incorporate the 24Retail Integrated Financial Statement.
How Finance’s Application was Created
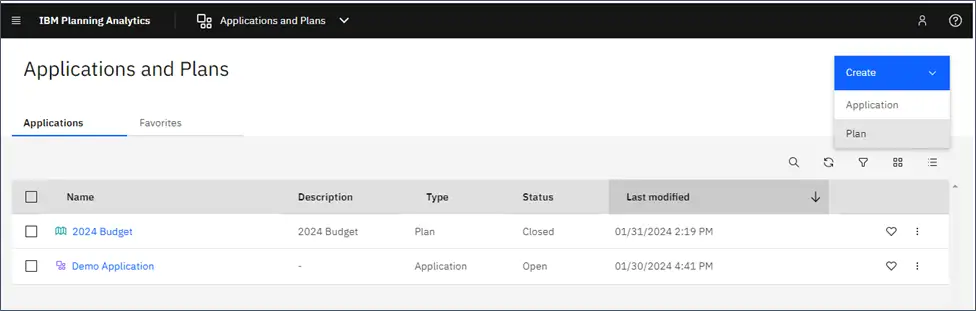
Within Applications and Plans, create a new application by clicking on Create and then select Application.

The Create an application screen appears. Add the application name (required) and description. You can upload files to the application which can provide any kind of information the application user may need.
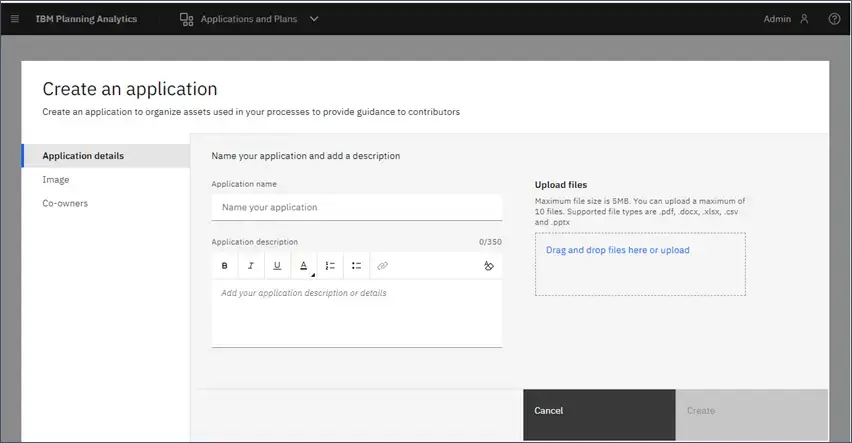
If you choose to upload files, the file links will appear here, under the application name, after the application is created. The file will download when a user clicks the link.

In the bottom right-hand corner, click Create to add the Application.

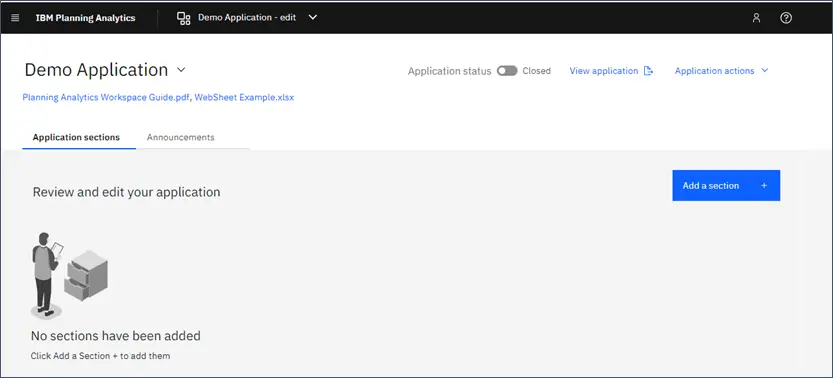
Application Sections
Sections are the basic building blocks of the Application. Sections are a convenient way of segmenting the application to make data easier to find. You can section your Application by your company’s management hierarchy, geographic region or some other method that fits your requirements.
To add a section to the Application, in edit mode, click Add a section.
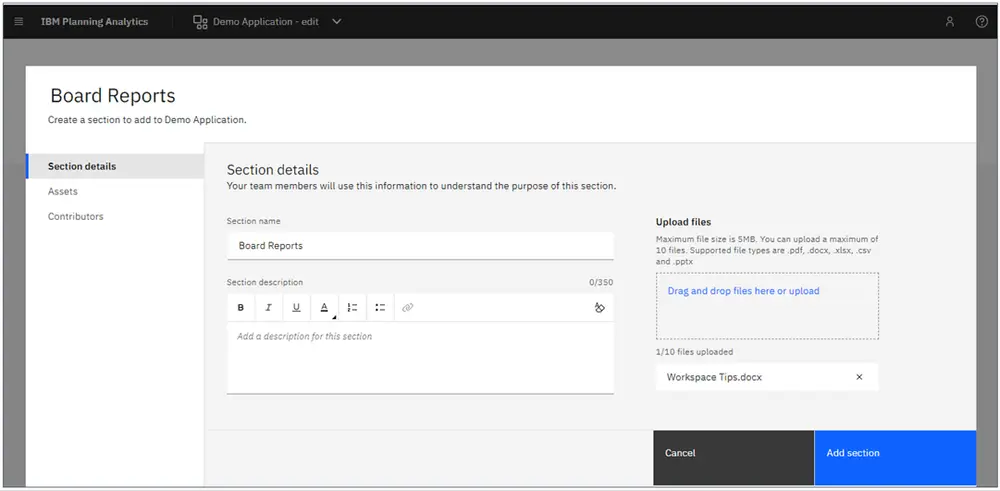
Enter a section name (required) and a description.

You can add up to 10 files for each Section. The file links will appear within the Section. Use this feature to provide instructions and/or sample information for users.
Below, a Section with the title updated and a file uploaded to the Section.
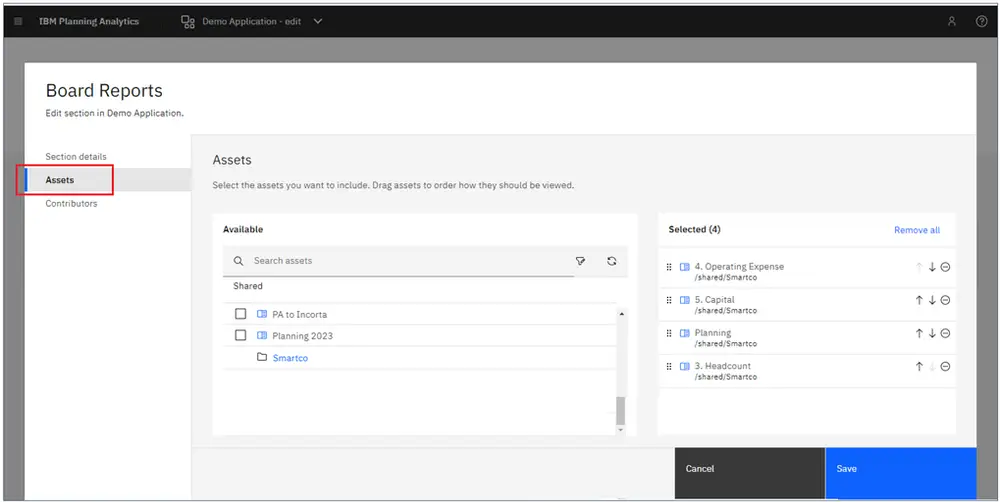
Click on Assets to add PA assets from the TM1 database. Assets can include Books, Views and Web sheets. Below, we chose four books from the Shared/Smartco folder.
Use Search and/or Filter to quickly find the Assets you need.
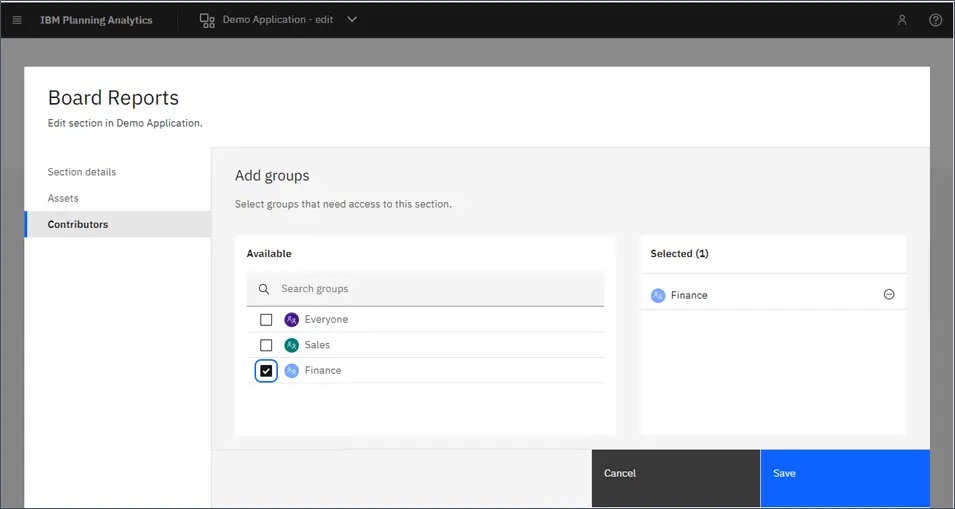
Add Contributors by choosing the appropriate groups. Application security is applied only to Planning Analytics Workspace user groups and roles. There are no links or dependencies to TM1® object security. It is the responsibility of the PAW administrator to ensure that the PAW user groups have the TM1 security permissions to view and edit the required assets.
Add as many sections as your Application requires.
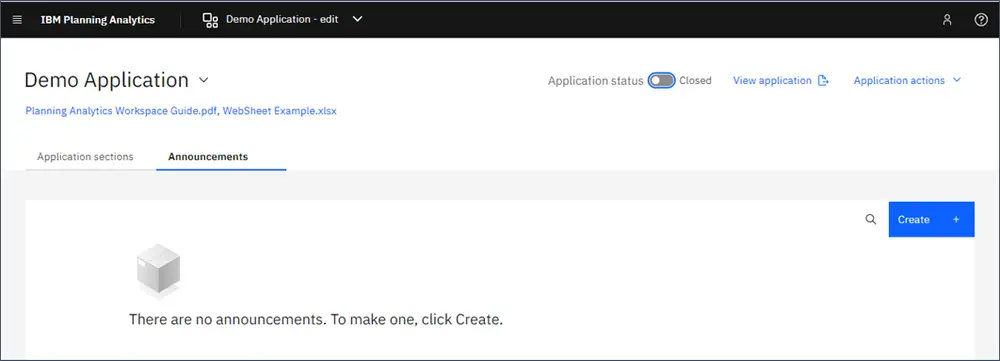
Create Announcements when you want to provide new information and/or instructions for your Application users. You can add multiple announcements to an application. When you have multiple announcements, the most recent announcements will appear first in the list.
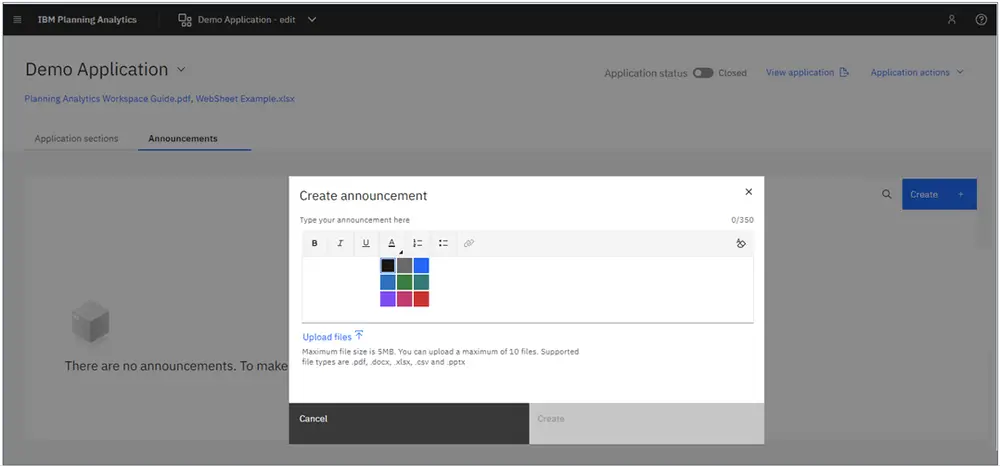
Add your Announcement here and upload any files that would pertain to your announcement.
Customize the font with color, bolding and/or bullet points or numbered lists.
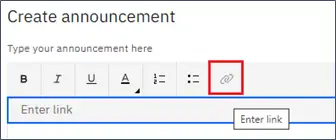
You can also include a link to a website within your announcement.
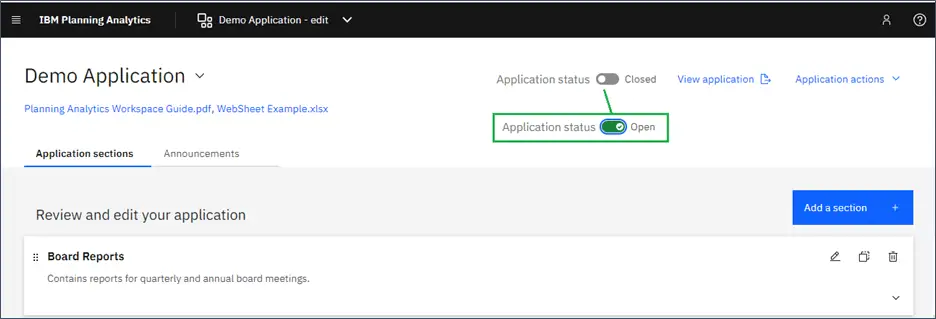
When the Application is complete, and it is time to open it to users, click on the Application status to Open.
Below, the application is complete and we are looking at what a user would see. This is the Contribution page. The application will automatically open to this page showing the assets from the first Section.
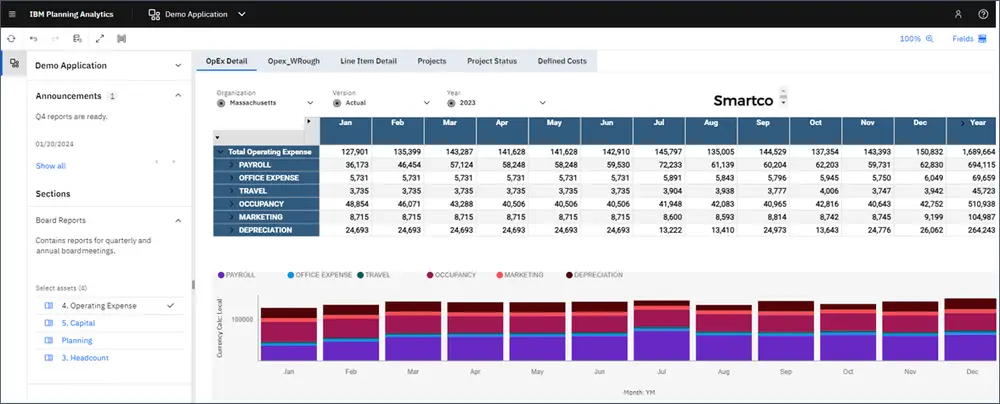
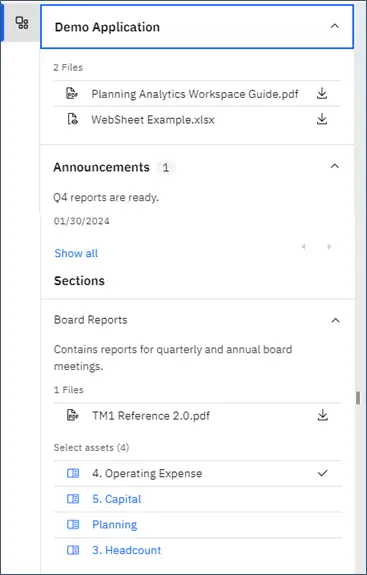
The left-hand panel shows information about the application.
Plans are applications for guiding processes that require scheduled tasks and workflow sequences. Plans can contain reports, data entry forms, schedules and monitoring tools, all to facilitate the processing of budgets and forecasts.
IBM defines a Plan as “assets that are grouped in tasks. These tasks can represent discrete tasks or contributions that must be completed in a planning or budgeting process. While tasks can be ordered in a Plan, there is no requirement for contributors to complete the tasks sequentially; they can be completed in any order. However, a Plan administrator can define task dependencies, so that a task becomes available to users only upon the completion of a different task. Tasks can also be assigned a due date for contributions.”
A Plan can be created by a Planning Analytics Workspace administrator, modeler or analyst. The Plan author can grant ownership permissions to other users. The Plans that a user has access to appear at the bottom of the Home page on the Your Applications tab.
Building a Plan
This year we built a Plan for the FP&A Department to facilitate the updating and management of the forecast in 2024.
Here is what we learned about the forecast process:
- The forecast is updated quarterly
- Each quarterly forecast can start immediately after the prior quarter is closed.
- There will be a group responsible for entering the forecast and another group responsible for approving the forecast
- All the PAW assets we need will be in the 2024 Forecast book under the Shared folder.
- We were given the begin and end date of each quarterly forecast period.
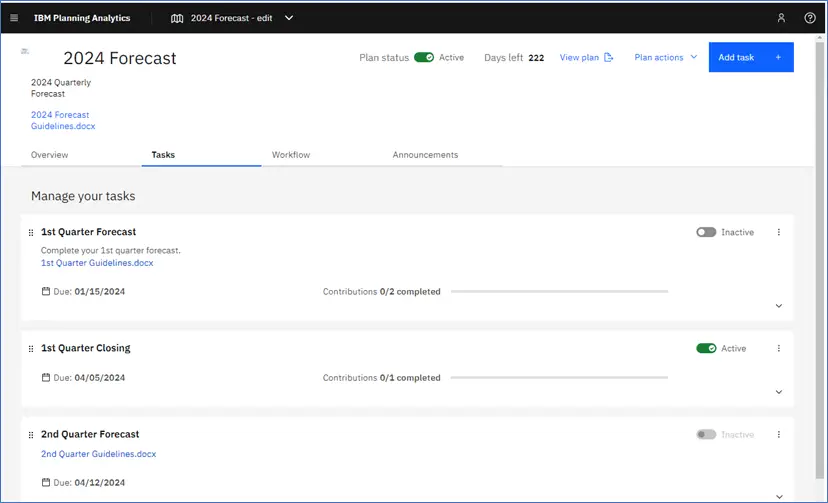
Below, in edit mode, are the first tasks in the 2024 Forecast Plan.
How the Forecast Plan was Created
To create a new Plan, click Create and select Plan.
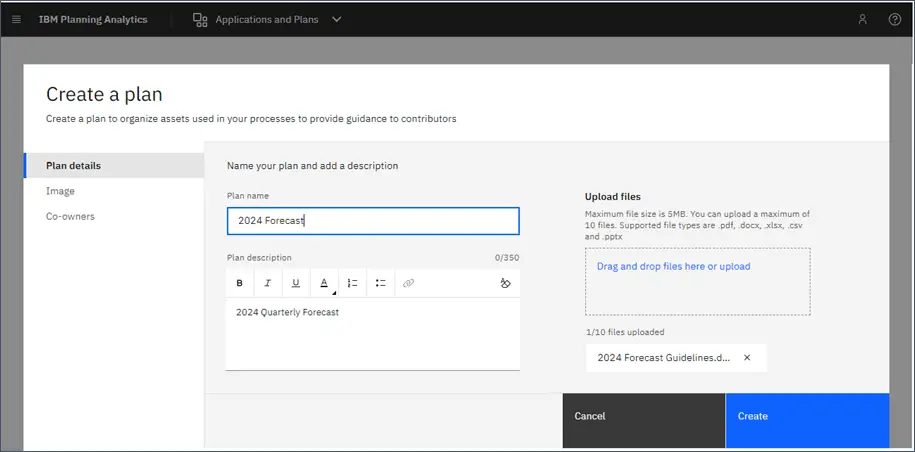
Within Plan details, enter the name of the Plan (required), a description, and upload any file.
Below; a Plan name and description have been added and a document has been uploaded. We uploaded a Word document to provide detailed instructions for the forecast.
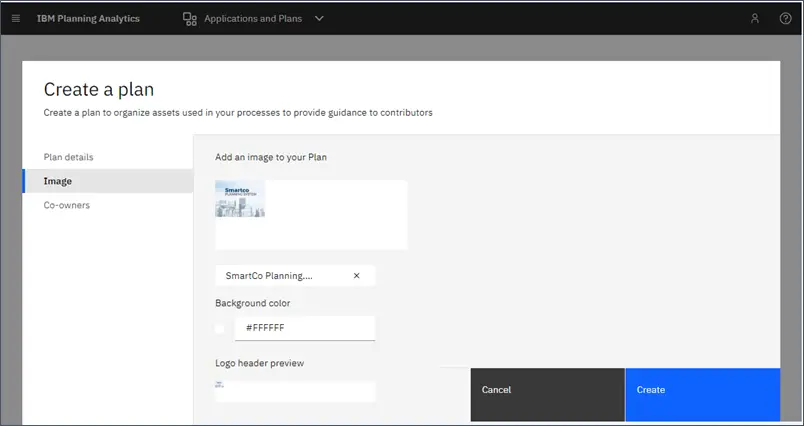
Add an Image to customize the thumbnail for your Plan. You can also change the color of the background.
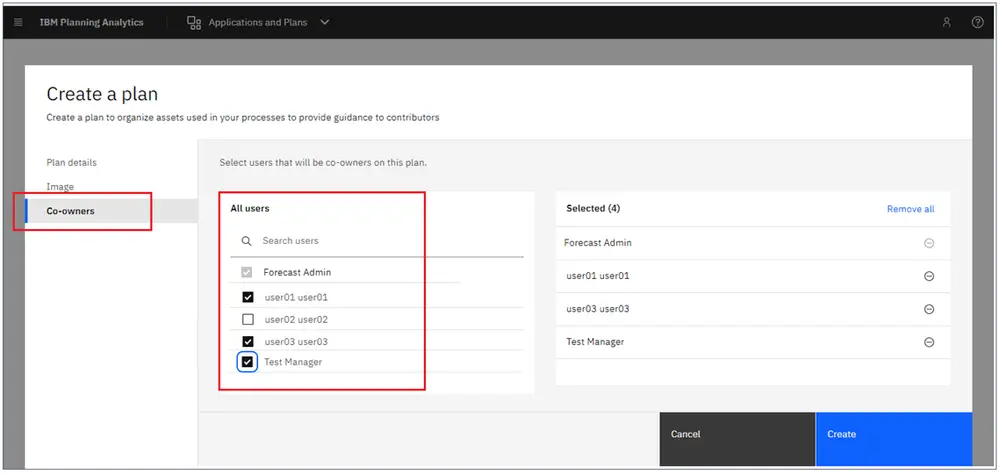
Co-owners
Select users that will be co-owners on this Plan. Co-owners have full control over the Plan and can modify all aspects of the Plan. Note that the administrator is a co-owner by default and cannot be removed.
Click Create to add the Plan.
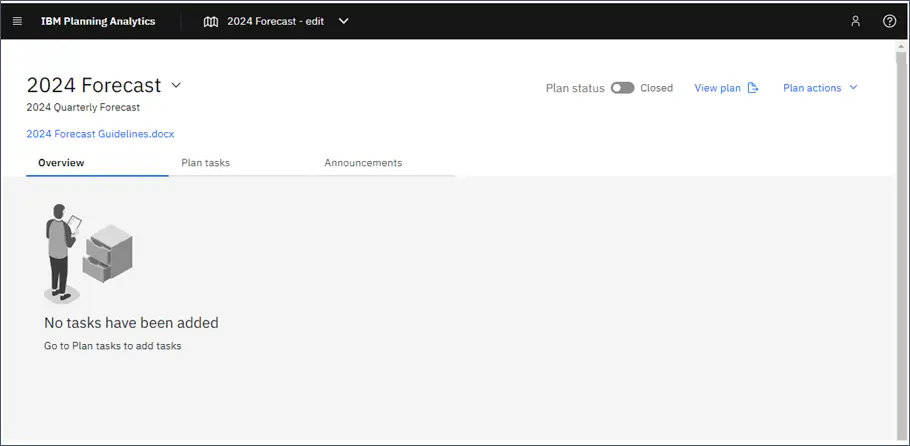
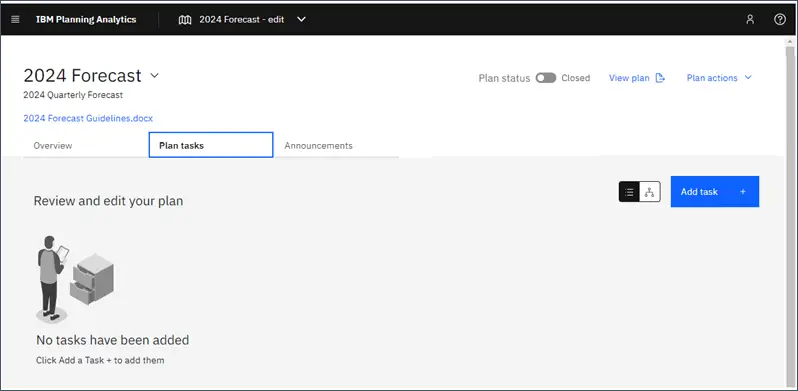
The Plan has been added and is ready for Plan Tasks.
Within Plan Tasks, click Add task.
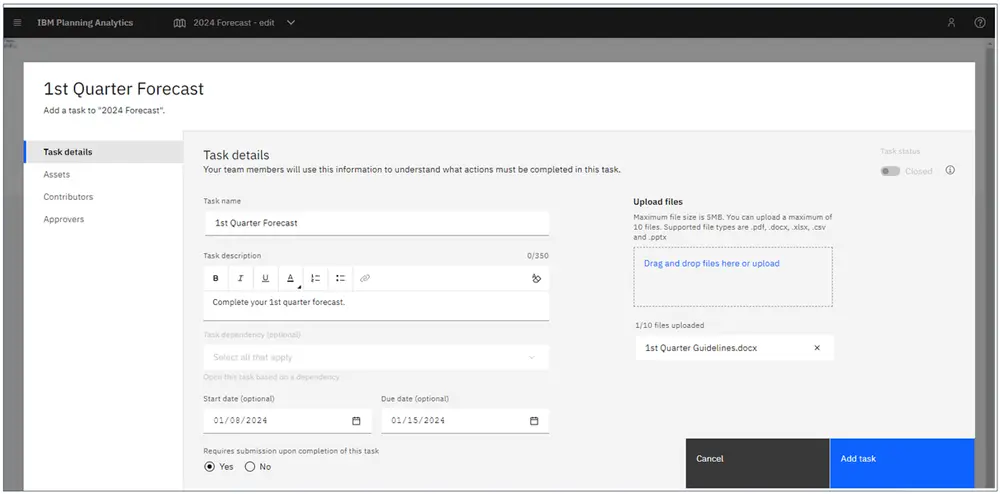
Add Task Details – Task Name (required), Task description, Task dependency*, Start date and Due Date, and upload any files needed for this task.
There are no Task Dependencies since this is the first task. (Task Dependencies are greyed-out in the picture below.)
Click Yes or No if this task requires the user to submit after data entry is complete.
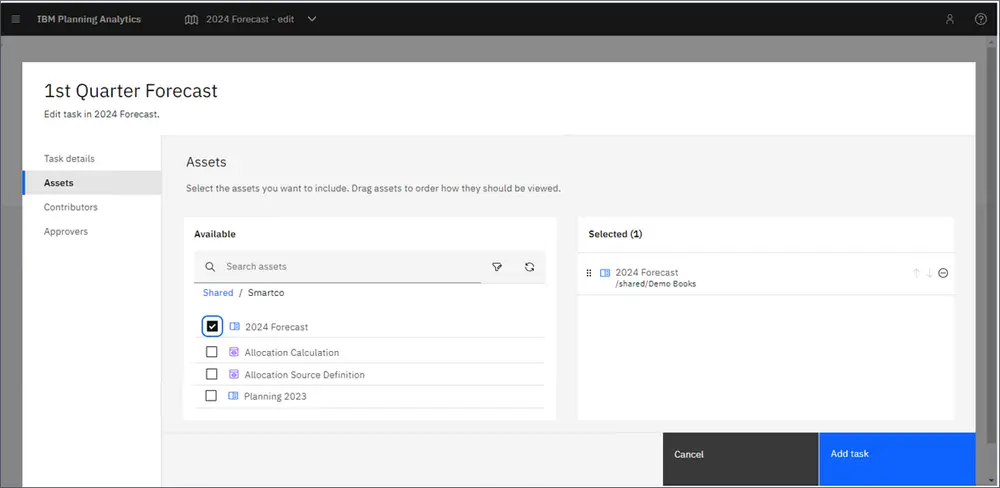
Assets – we added the 2024 Forecast book by clicking the checkbox. This book contains all the assets needed for the forecast. You can select multiple assets here as your Plan requires.
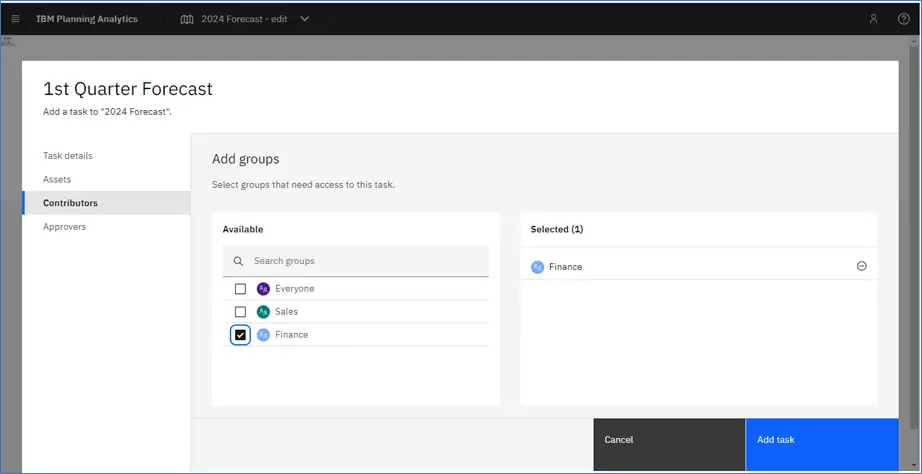
Choose your Contributors
A contributor is a user who is a member of a user group assigned to a least one Plan asset. A user only has access to, and will only see the task (or tasks) to which their group has been assigned.
Within Contributors, choose the groups that you want to assign to the task. Choose any combination of groups that should have access, including the Everyone group. Choose the Everyone group if you want ALL users to have access to the task.
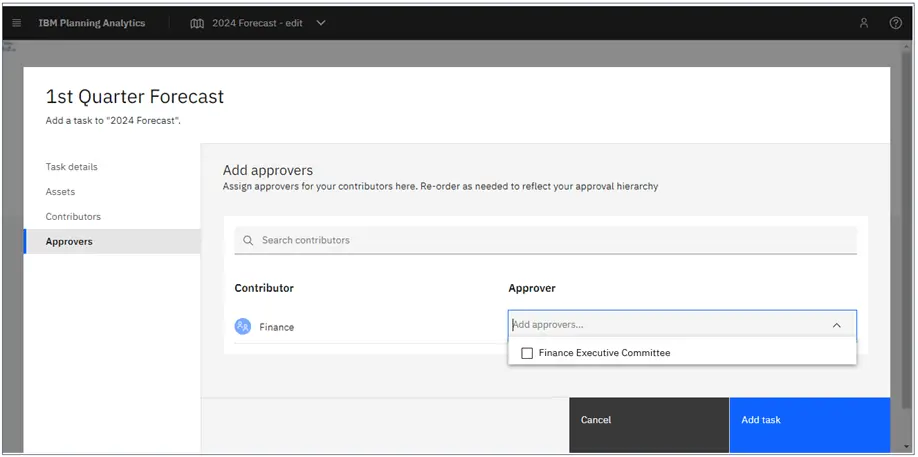
Add Approvers
Select the user groups that will be approvers for each Contributor group. Approvers review user entries and can approve or reject the entries.
Below; we chose the Finance Executive Committee group as the approver for the Finance contributor group.
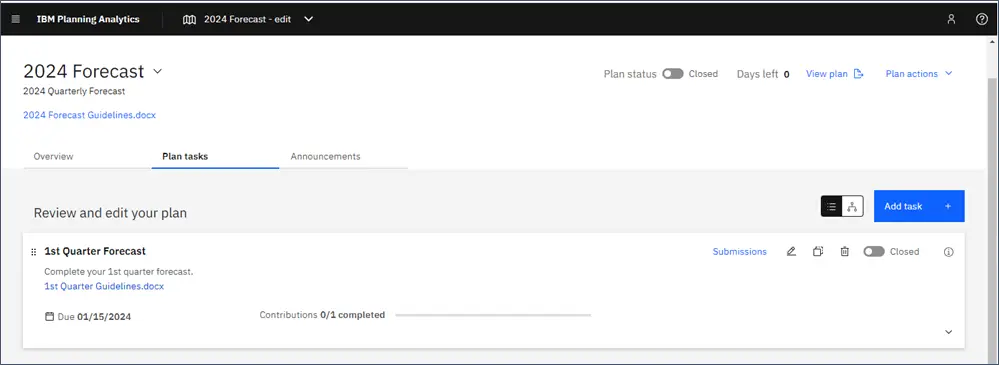
Below, the task has been added.
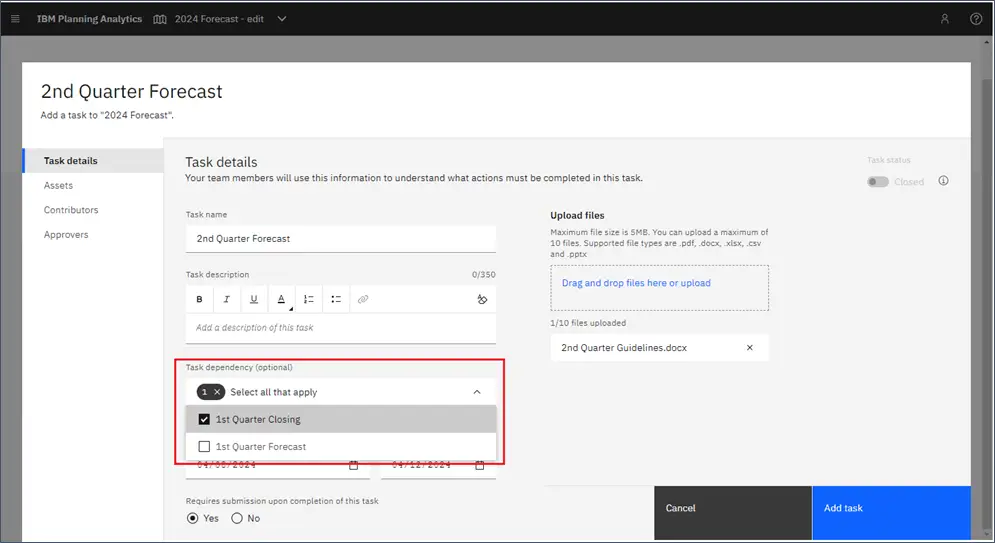
When you have two or more tasks, you have the opportunity to add a Task dependency as shown below. In the example below, a task to complete the 1st quarter closing was added and now we are adding a task for completing the 2nd quarter’s forecast. We chose the 1st Quarter Closing task as our dependent task. When the 1st Quarter Closing task is complete the 2nd Quarter Forecast task will automatically open. If there were two or more dependent tasks, then the 2nd Quarter Forecast would not open until all dependent tasks were complete.
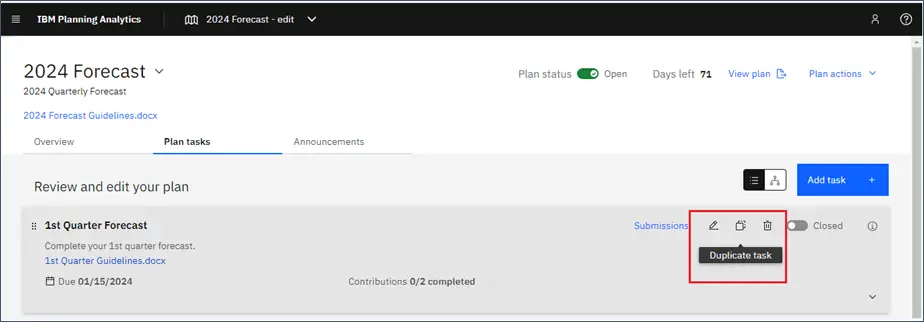
You can duplicate a task by clicking on the copy icon (highlighted below) to quickly create a new, similar task.
A duplicated task will retain the dependencies, contributors, and approvers copied from the original task.
The following attributes will be different from the original task:
- Task name – the original name will be copied with an appended underscore and number at the end of the task name.
- Start and due dates – will be reset, but will be copied over to the duplicated task if the start date occurs in the future.
- Submission logs – Submissions and approvals are not copied over and submission logs are reset in the duplicated task.
- Task status – The status for duplicated tasks is set to Closed.
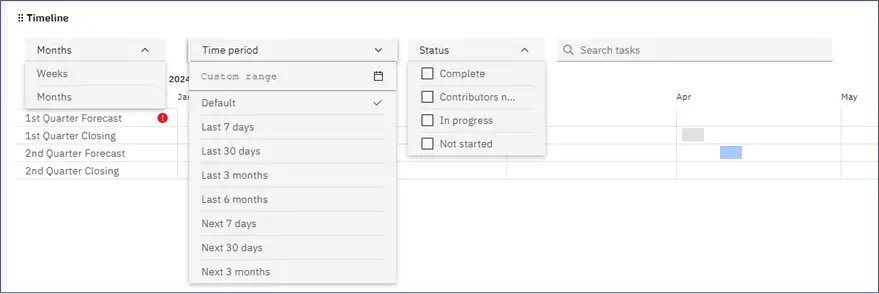
Below, the overview of the Plan for the 2024 Forecast
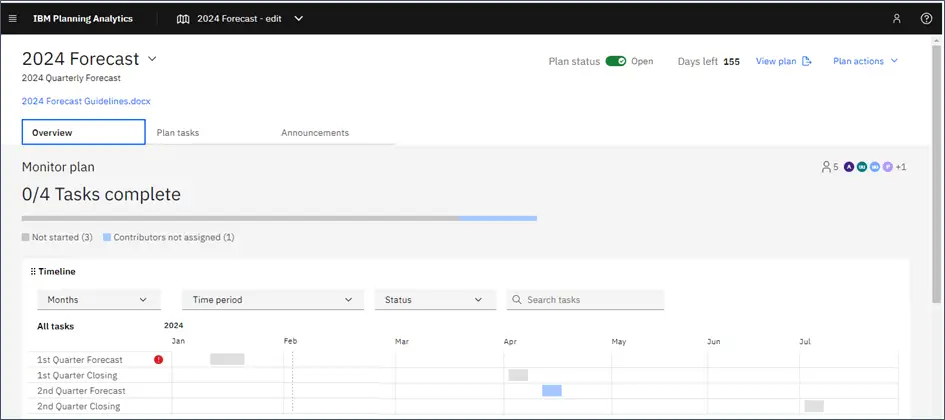
The Timeline can be filtered by weeks or months, by Time periods, which can include a Custom range, or by Status.
You can duplicate a Plan by going to the Plan page, clicking Plan actions, then select Save as. Rename the new Plan and click OK. All details and attachments of the original Plan are copied over to the duplicated Plan.
Opening a Plan
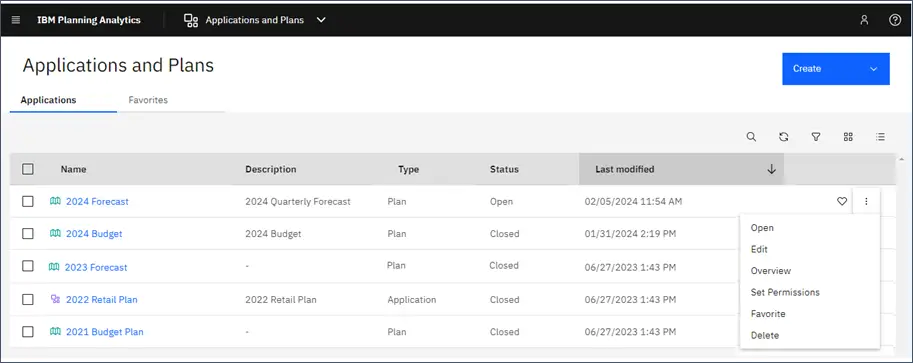
You can open or delete a Plan by clicking the check box for the Plan and then opening or deleting the Plan from the blue action bar.
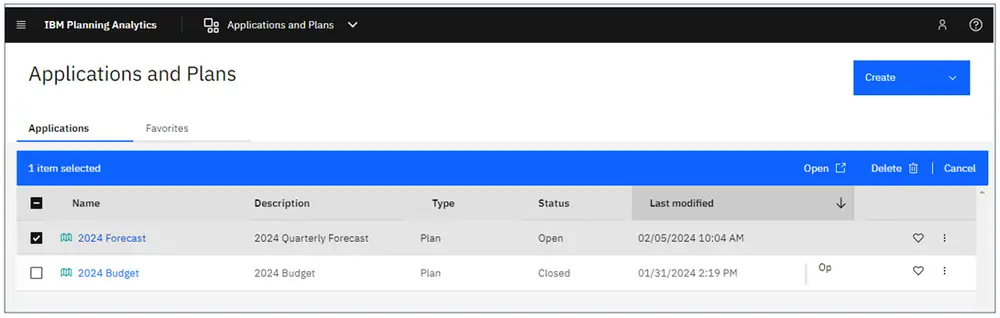
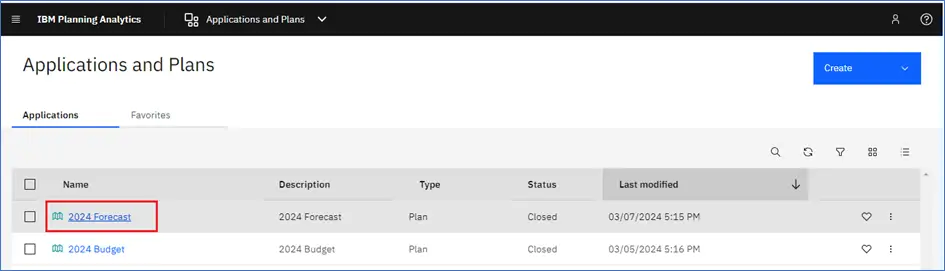
You can open a Plan directly by clicking the name of the Plan.
You can also open or delete a Plan by clicking the Action Icon for the Plan and then selecting the appropriate action.
Editing a Plan
The steps in editing a Plan are similar to those necessary to create a Plan.
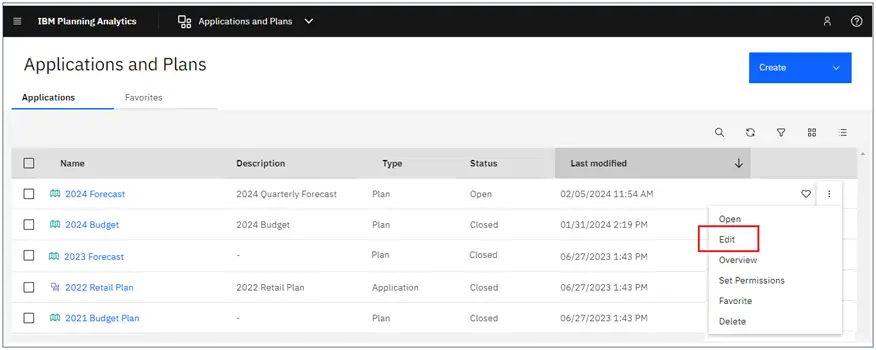
You can edit a Plan by clicking the Action Icon for the Plan and then selecting the Edit.
In Edit mode you can edit Tasks and Announcements. The Overview and Workflow tabs are view-only and will reflect any changes made to any of the Tasks.
To edit a Task, click on the Action icon and then click on Edit task.
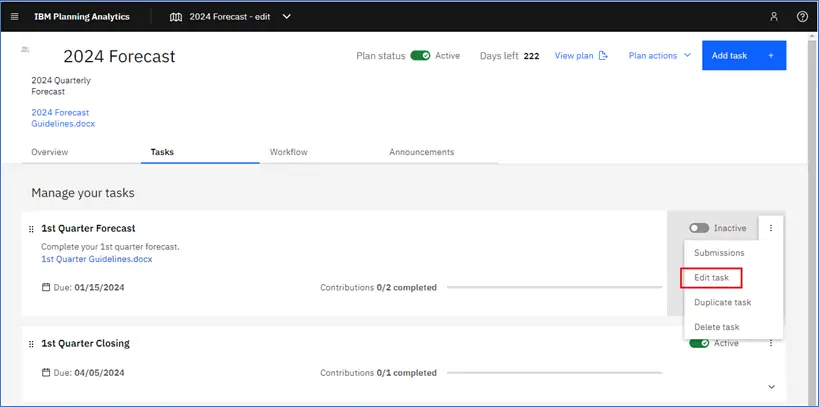
Editing a task is the same process as creating a new one. Update Task details, Assets, Contributors and Approvers as necessary. Click Save when editing is complete.

Summary
Use Applications and Plans to enhance your user’s experience within Planning Analytics Workspace. Organize your Workspace assets to ensure users can navigate quickly and easily to reports, charts or input forms. Often users may be slow to adopt a new reporting application, especially if it’s difficult to find relevant information. Well designed Applications and Plans can speed user acceptance and increase the return on your Planning Analytics investment.
If you have any questions or would like PMsquare to provide guidance and support for your analytics solution, contact us today. Be sure to subscribe to our newsletter to have PMsquare articles and updates sent straight to your inbox.
Published Date: