
Share


Dan Swan, March 10, 2025
Get the Best Solution for
Your Business Today!
The following new and changed modeling features are available starting in Planning Analytics Workspace releases 2.0.98 and .99 and later.
Table of Contents
Lock and Unlock an Element
Release 2.0.98
In this release you can lock or unlock an element within a Workbench in Workspace.
Only users with lock permissions or higher can unlock and update data associated with that element. An Admin user can unlock the element, but cannot update the data to a locked element. The user who locks the element will not be able to update the data unless that user is an Admin and unlocks the element first.
Locking an element allows you to permanently archive the data. Locks persist even after the remote server shuts down.
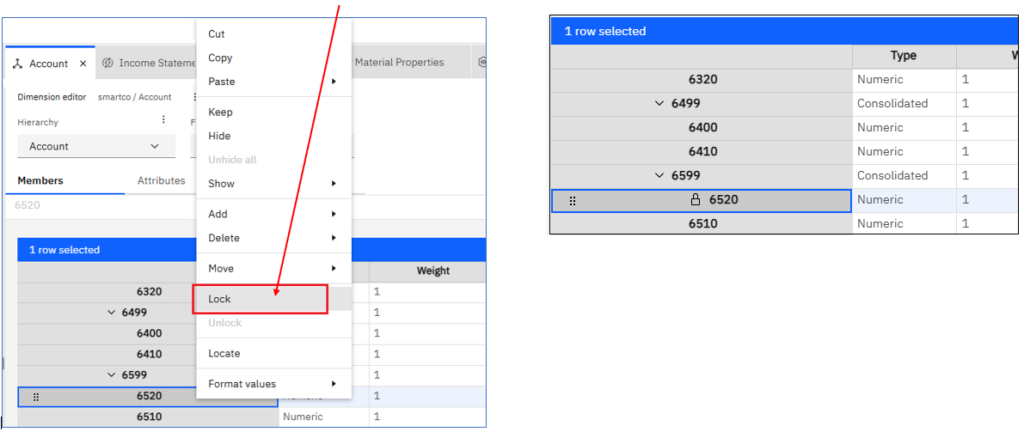
To lock an element:
In a Workbench, open the dimension in the Dimension editor.
Right-click on the element you want to lock and click Lock. The lock icon appears beside the locked element.
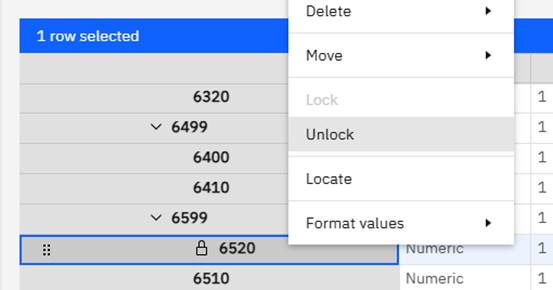
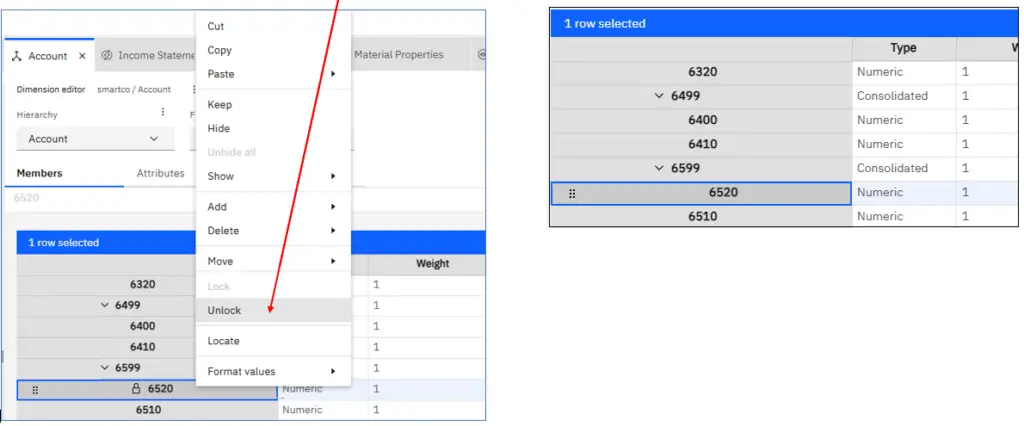
To unlock an element:
In a Workbench, open the dimension in the Dimension editor.
Right-click on the element you want to unlock and click Unlock. The lock icon is removed from the element.
MDX Editor Updates
Release 2.0.98
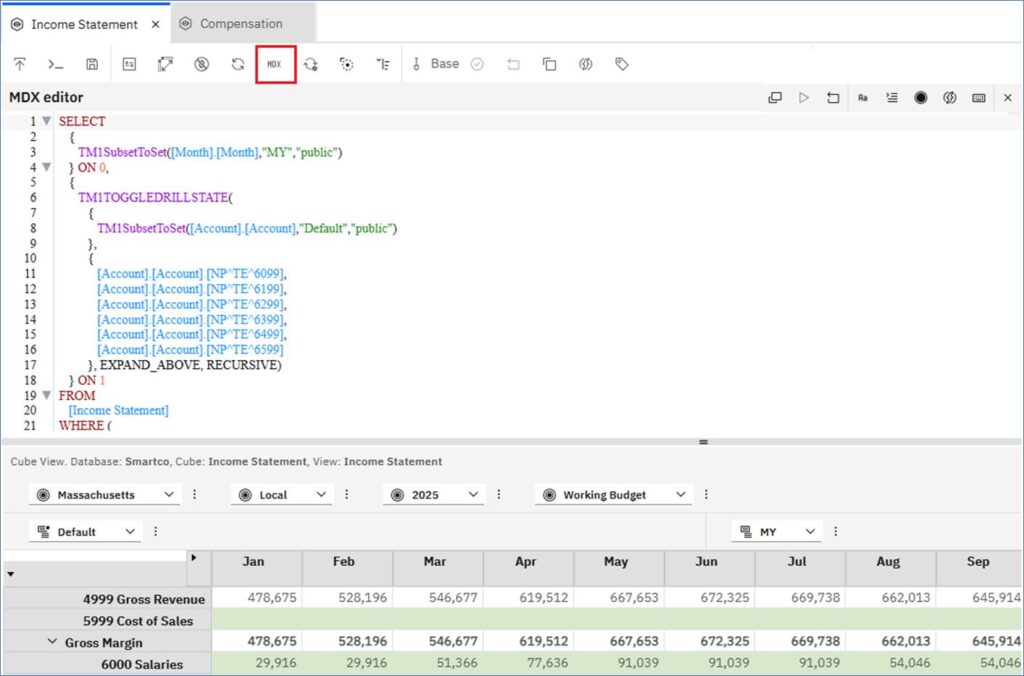
In this release a new MDX editor is available in Workspace books and the modeling workbench.
The MDX editor allows you to make changes to the MDX expressions in a view.
Click the Edit MDX icon to open the MDX editor.
MDX Editor Tool Bar
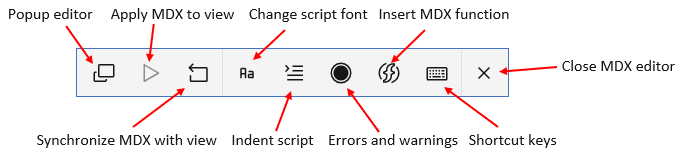
- Popup editor – expands the editor to near full screen. Click the icon again to shrink the editor. Should be called Popout editor.
- Apply MDX to view – applies changes in the MDX to the view. This icon is greyed-out until an addition, removal or change in the MDX is made.
- Synchronize MDX with view – click this icon to change the MDX to conform with changes made in the view.
- Change script font – click to change the font and/or the font size.
- Indent script – manually ident your script. Identing is automatic now (see below), but you can still make manual changes.
- Errors and warnings – click to trouble-shoot your MDX script. When clicked, a new window will open up below the script.
- Insert MDX function – opens a list of several MDX functions. When you choose a function, that function will immediately appear where your cursor is within the script.
- Shortcut keys – click to view a list of keyboard shortcuts.
Updates to the MDX Editor
- Autocomplete: Offers suggestions for dimension names, functions, and other TM1® objects as you type..
- Syntax coloring: Displays different parts of the MDX statement in distinct colors to enhance readability, such as keywords in red and tuples in blue..
- Undo: Undo the last change.
- Redo: Redo the last change.
- Find and replace: clicking CTRL+f opens a dialog where you can search for specific text in the MDX, and replace it.
- Indenting: The MDX editor now automatically formats the MDX script, applying indentation to each line. When you make changes to the view, the MDX editor updates with the correct formatting. You can also manually indent the script lines by clicking Indent Script in the MDX editor toolbar.
- Apply applies your MDX edits to the view. When you click Apply, a text box appears telling you if the changes were made successfully.
- Synchronize replaces the MDX in the editor with the one represented in the view. After you click Synchronize, click OK to synchronize.
Note: When you make edits in a view, the MDX editor automatically updates to reflect those changes. However, edits made directly in the MDX editor do not automatically synchronize with the view. To apply your changes, you must manually use the Apply and Synchronize buttons in the MDX editor toolbar.
The new MDX editor is not currently available in IBM Planning Analytics for Microsoft Excel.
Add notes to a modeling workbench
Release 2.0.98
In this release you can add notes to a modeling workbench to document your progress, explain the purpose of an object or workbench, or provide instructions for team members on its usage.
To create or edit a note, click the Note icon on the side toolbar of the workbench.
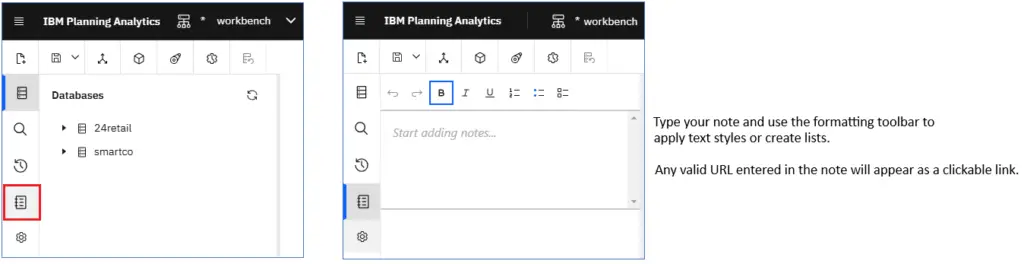
Click Save to save the note to the workbench.
Improved verification of valid file types on file upload
Release 2.0.99
When a file is uploaded, Workspace will now verify a file’s validity based on its type rather than its extension.
Some of the supported file types include:
- Text files (such as .txt, .csv, .css, .html)
- Application files (such as .docx, .json, .ics, .xml, .php, .pdf, .zip, .7z, .rtf, .rar, .xlsm)
- Image files (such as .jpeg, .jpg, .svg, .gif, .png, .heic)
- Font files (such as .tff,. woff, .otf)
- Video files (such as .mp4, .mpeg, .avi)
- Audio files (such as .mp3, .wav, .weba, .mid)
Roll Back Value Changes in a View
Release 2.0.99
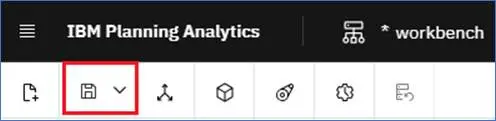
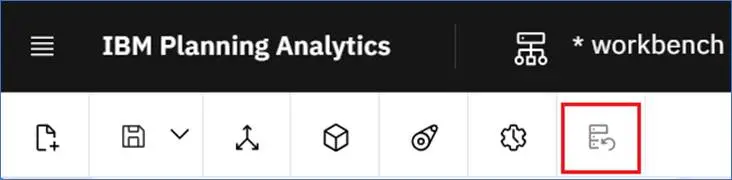
Use the Roll Back Data Entry button to undo (roll back) any value changes in a view.
The Roll back data entry button is on the Workbench toolbar.
The Roll Back Data Entry button is disabled if none of the views in the workbench contain changed values. Once a value is changed in any view, the button becomes enabled and stays active as long as there are unsaved changes in any view. Even if you save and close the view with the changes or save and close the workbench, the button will remain enabled until the data is committed*.
The button rolls back data changes starting with the most recent modification in any view, regardless of whether the view is open or closed, open in a separate window, or displayed as a single-cell visualization. You must click the button for each change to roll it back. You cannot roll back all changes in one click.
If consolidated values were changed, all dependent values are also rolled back.
There are three important factors:
- In order to be able to roll back changes, the transaction log for the TM1 database must be enabled**. The transaction log records every event that occurs on the TM1 database. Any data entries recorded in the transaction log can be rolled back. However, the transaction log exists until a Save Data All action is executed on the TM1 database.
- You cannot roll back changes if you commit to a sandbox.
- Rollback data entry does not apply to Websheets. Use Undo
to undo Websheet changes.
*This refers to committing data from a sandbox to the base data.
**Contact your TM1 administrator for assistance to enable the transaction log.
Export data from a cube or view on a modeling workbench
Release 2.0.99
In this release you can now export data from a cube or view to a CSV file. The exported file is saved to your local Downloads directory.
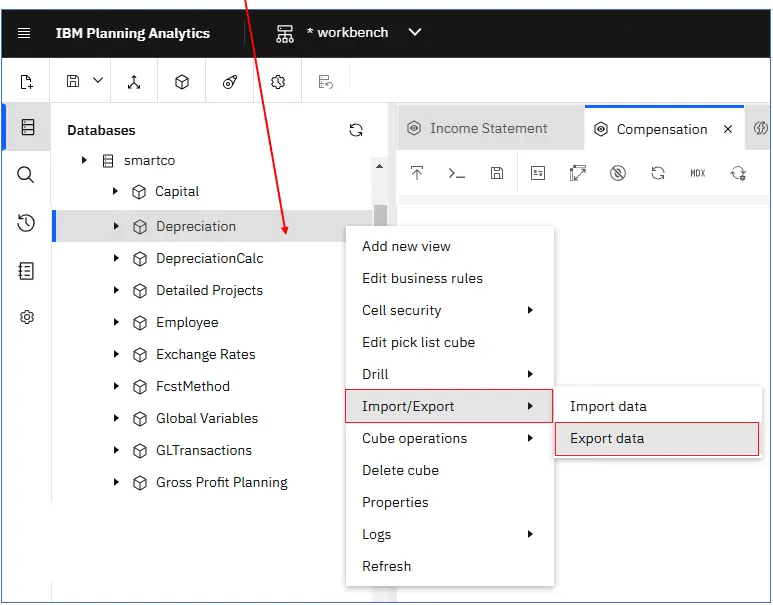
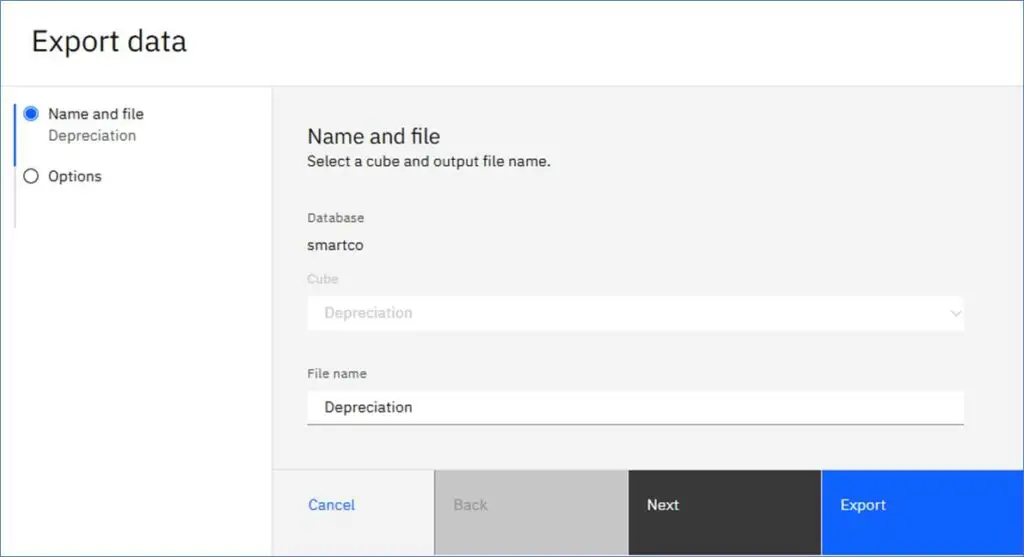
To export data from a cube, right-click the cube within the modeling workbench Databases tree, then click Import/Export > Export data.
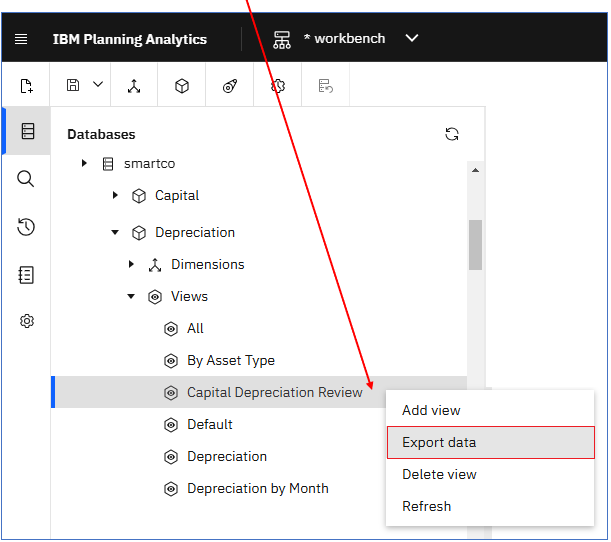
To export data from a view, right-click the view within the modeling workbench Databases tree, then click Export data.
The default File name will be the same as the cube name. Enter a File name if you want use a different name.
Click Next.
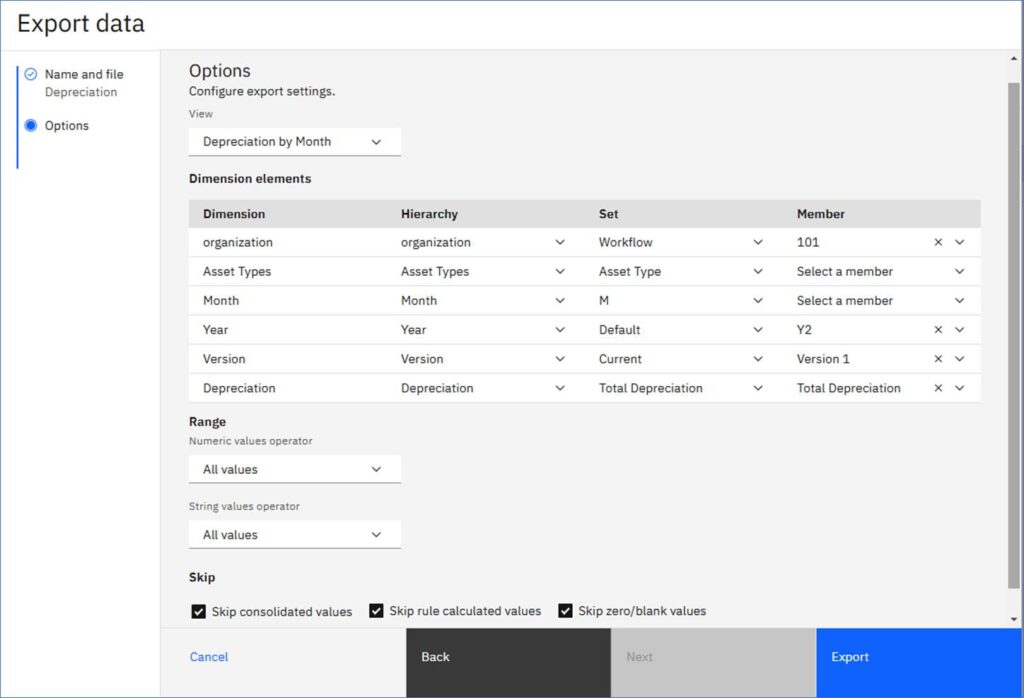
When you export data from a cube or view, you have the following options:
- You can select a different view
- For each dimension in the cube, you can select a Hierarchy, subset (Set) or a Member.
- You can use numeric operators or string value operators to set a range of values to export.
- Use the check boxes to include/exclude consolidated values, calculated values, or zero/blank values. These are all checked by default.
Cube or View Export Options
Export a dimension or hierarchy from a modeling workbench
Release 2.0.99
As of this release you can export a dimension or hierarchy to a CSV file. The file is saved to your local Downloads directory.
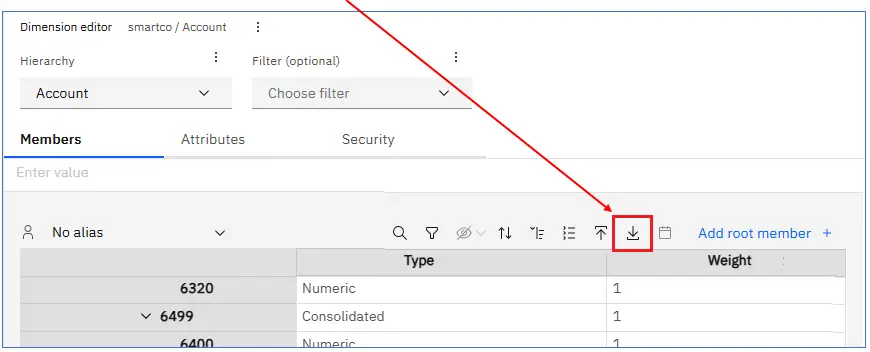
Right-click a dimension or hierarchy on the modeling workbench Databases tree, then click Export members. In the Export members dialog box, select the Hierarchy you want to export and enter the File name.

You can also click the Export members icon in the Dimension editor. The Export member dialog box appears as shown above.
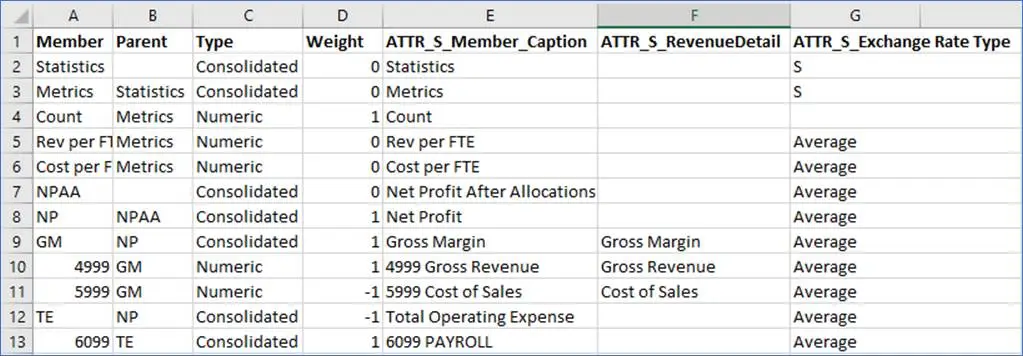
When the file is exported, the resulting CSV file includes the following information about each member:
- Member name
- Parent/child relationship
- Type
- Weight
- any defined Attribute names and values
Attribute names are prefixed with either ATTR_N or ATTR_S when they are exported, depending on the attribute type (numeric or string, respectively).
Manage User and Group Relationships on a Local Planning Analytics Database
Release 2.0.99
In this release, you can administer users and groups on a Planning Analytics local database from the Modeling Workbench.
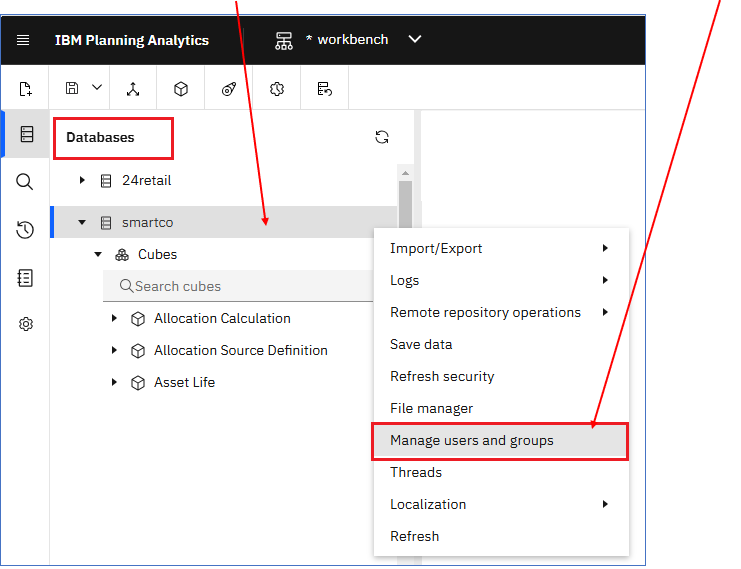
To assign or remove users from groups on a PA database;
In a Modeling Workbench, right-click the database within the Databases tree. Select Manage users and groups.
Manage Users and groups opens the }ClientGroups cube view. Right-click on a cell at the intersection of a user and group that you want to assign to the user.
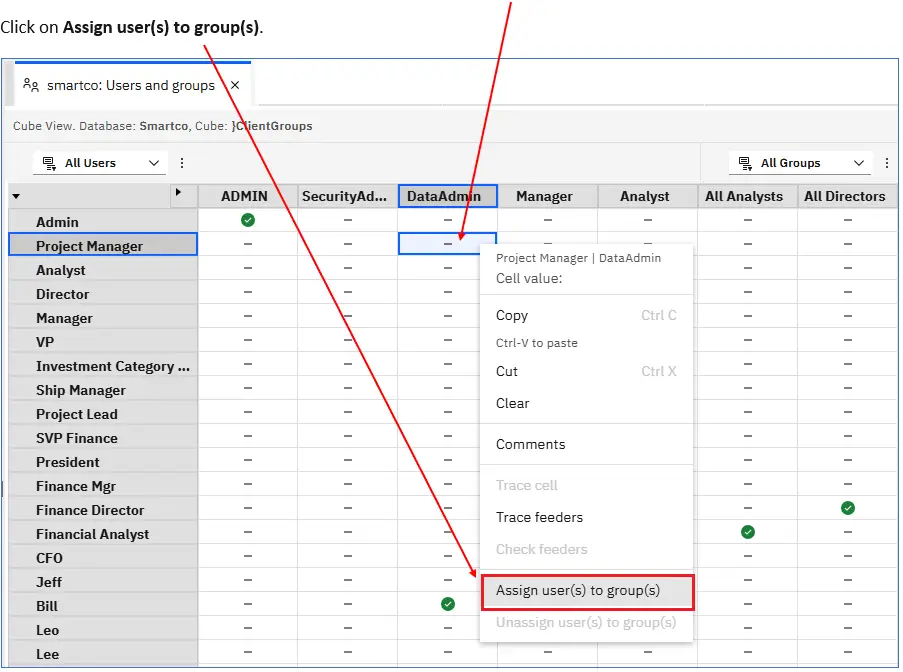
A green check mark will appear in the cell when the user is assigned to a group.
Use the same procedure to unassign a user to a group.
The procedures for managing users and groups in a local environment are identical to that in Planning Analytics on Cloud.
TM1 authentication in your PA local environment is required to use this capability. Your authentication mode is determined by the PAAuthMode setting in the paw.ps1 (Windows) or paw.env (Linux®) Configuration file 2.0 or Configuration File – 2.1 for your local installation.
For more information from IBM on this subject go to Administer Users and Groups 2.0 or Administer Users and Groups 2.1.
Conclusion
As you explore the latest enhancements in Planning Analytics Workspace (PAW) modeling, it’s crucial to leverage these features effectively to drive better outcomes for your business. Whether you’re optimizing existing models or building new ones, choosing the right partner can make all the difference. With PMsquare’s expertise in PAW and data analytics, we can guide you through these updates, ensuring a smooth and impactful implementation. If you have any questions or need support in optimizing your PAW environment, don’t hesitate to reach out to PMsquare today.
We hope you found this article to be insightful and informative. To stay ahead with the latest updates and best practices, be sure to subscribe to our newsletter for expert insights delivered directly to your inbox.